Issue and send CW20 Tokens (Vault)
You can easily connect a gaming ecosystem to the XPLA Chain using CW20! Let's issue tokens and transfer using XPLA Vault wallet. Refer to the previous stage for downloading and creating the wallet.
But I have zero idea what CW20 is!
The XPLA Chain utilizes a smart contract platform called Cosmwasm. Just like ERC20 on Ethereum, CW20 is the standard for Fungible tokens in Cosmwasm. For more, refer to the docs for Cosmwasm.
Issuing CW20
You can issue CW20 by following the steps below:
If you're using wallet with the Vault Chrome Extension from the Vault website, make sure to disable Chrome's pop-up blocker. Before using Vault Website, please ensure that you have disabled the pop-up blocker in Chrome.
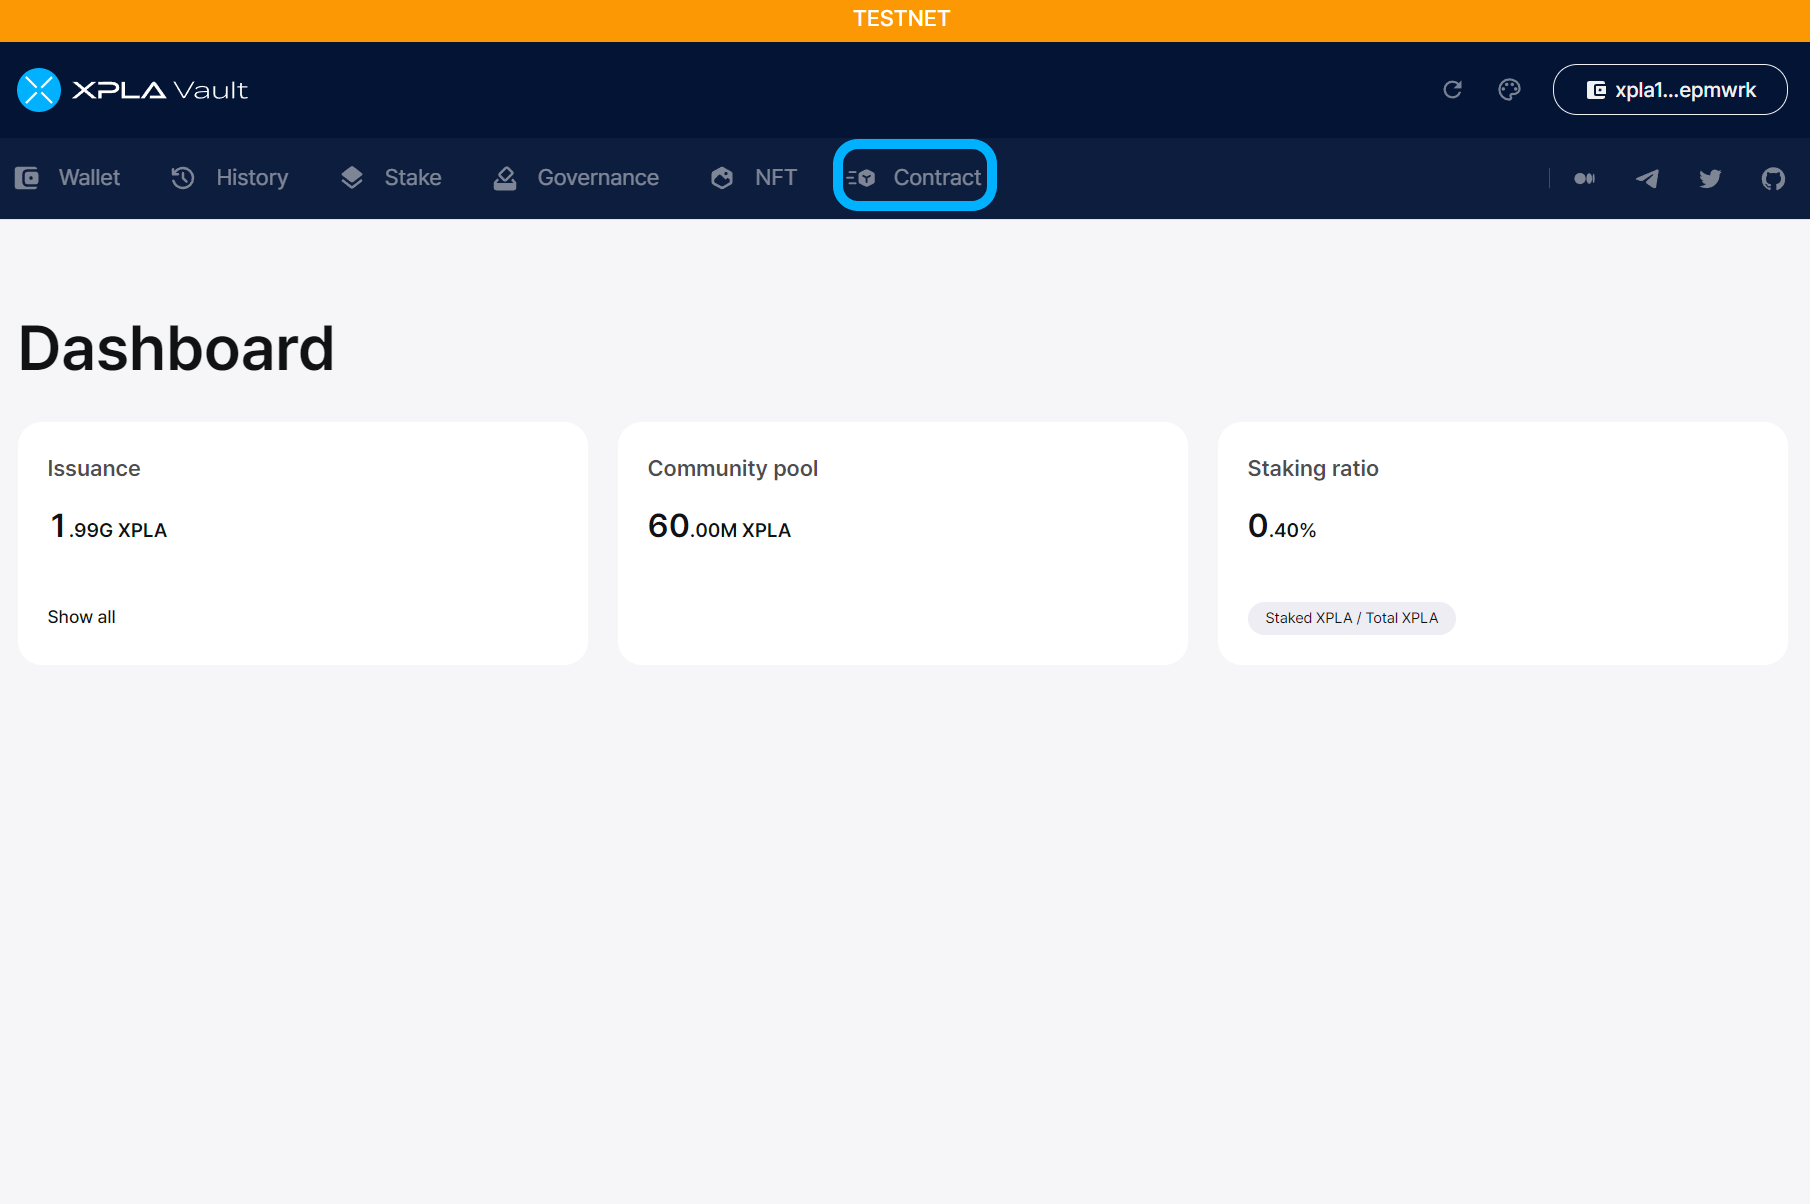
Access Vault
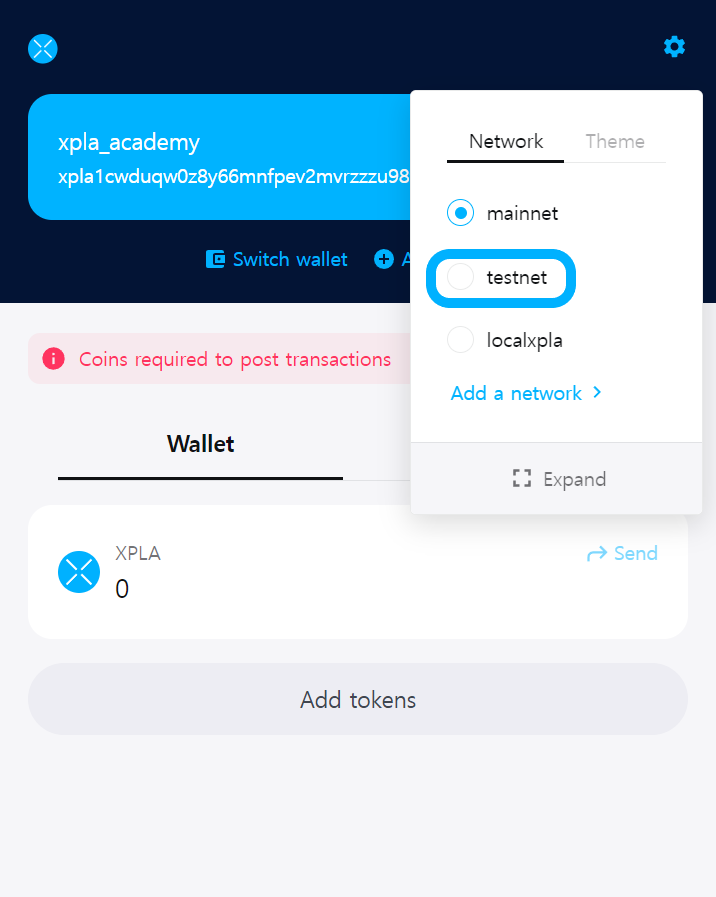
First off, select a wallet for CW20 issuance in your Chrome Extension Vault, then set the network for testnet.
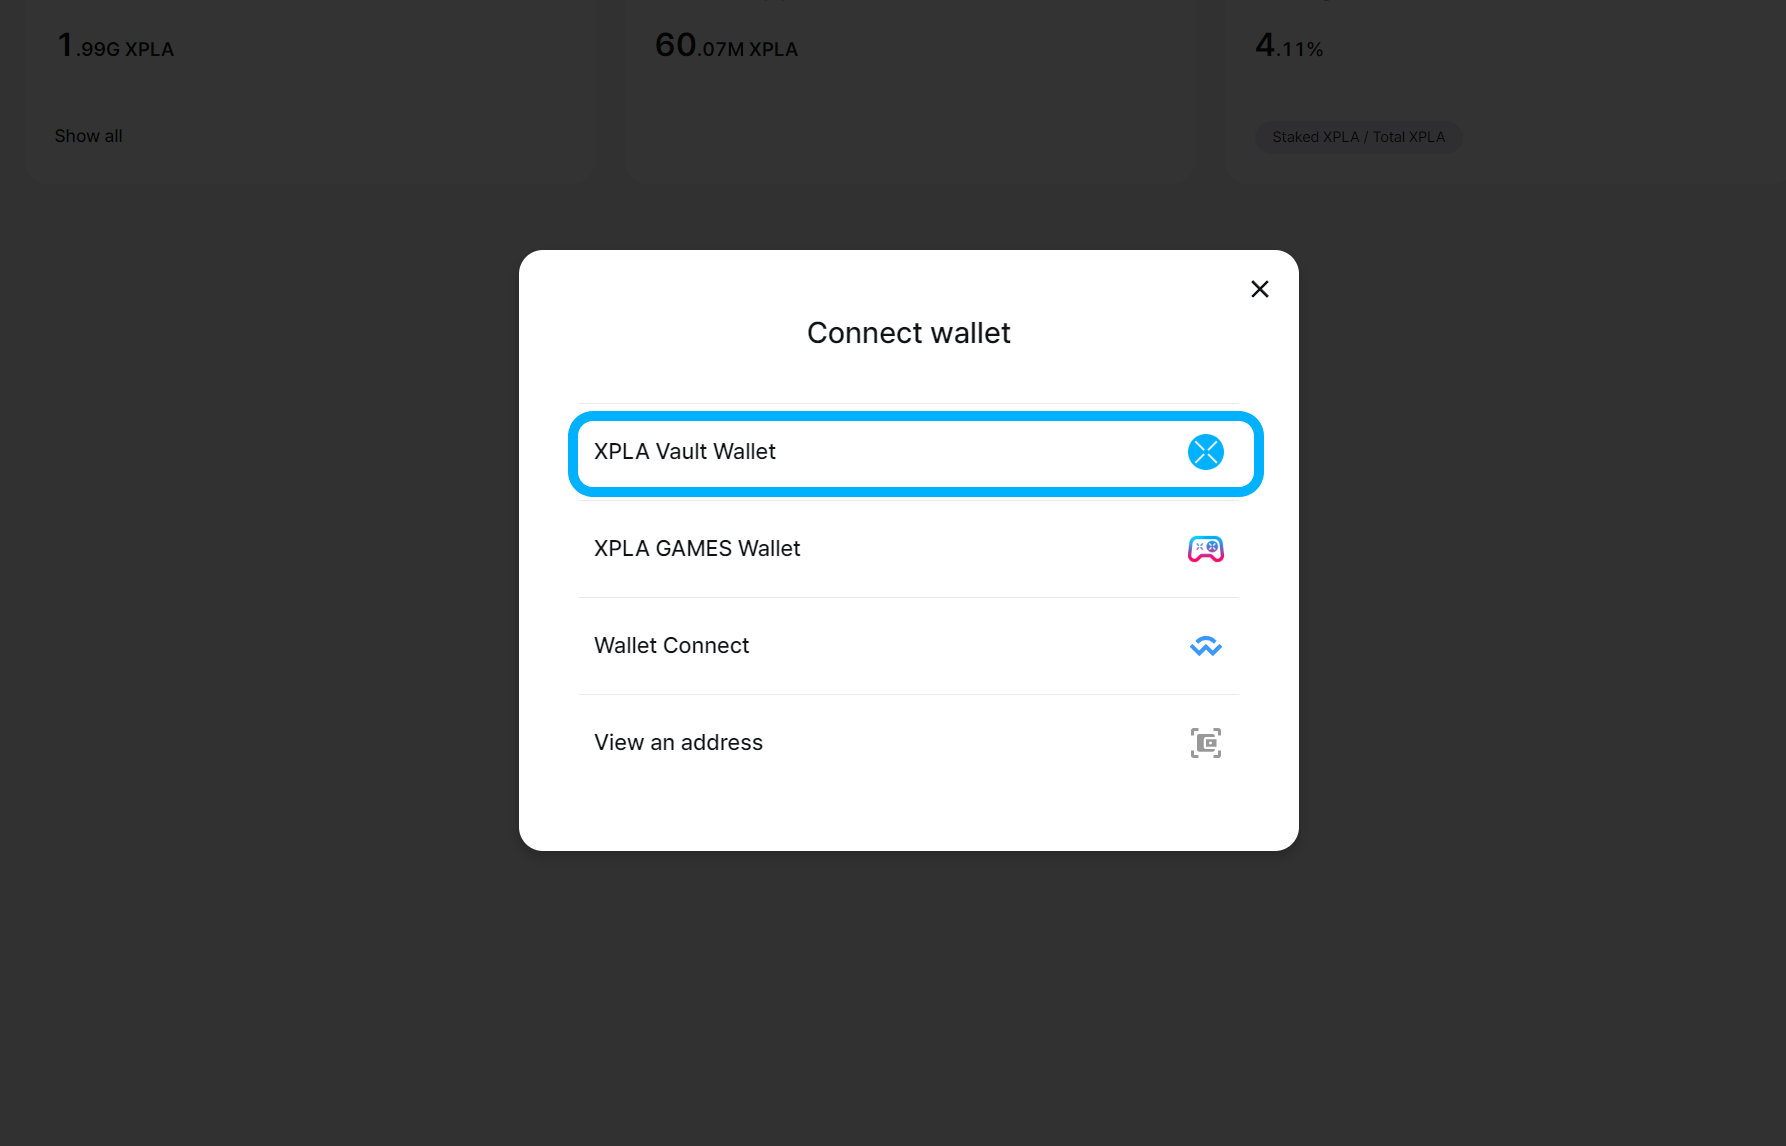
Access the Vault page, and hit Connect on the top right.


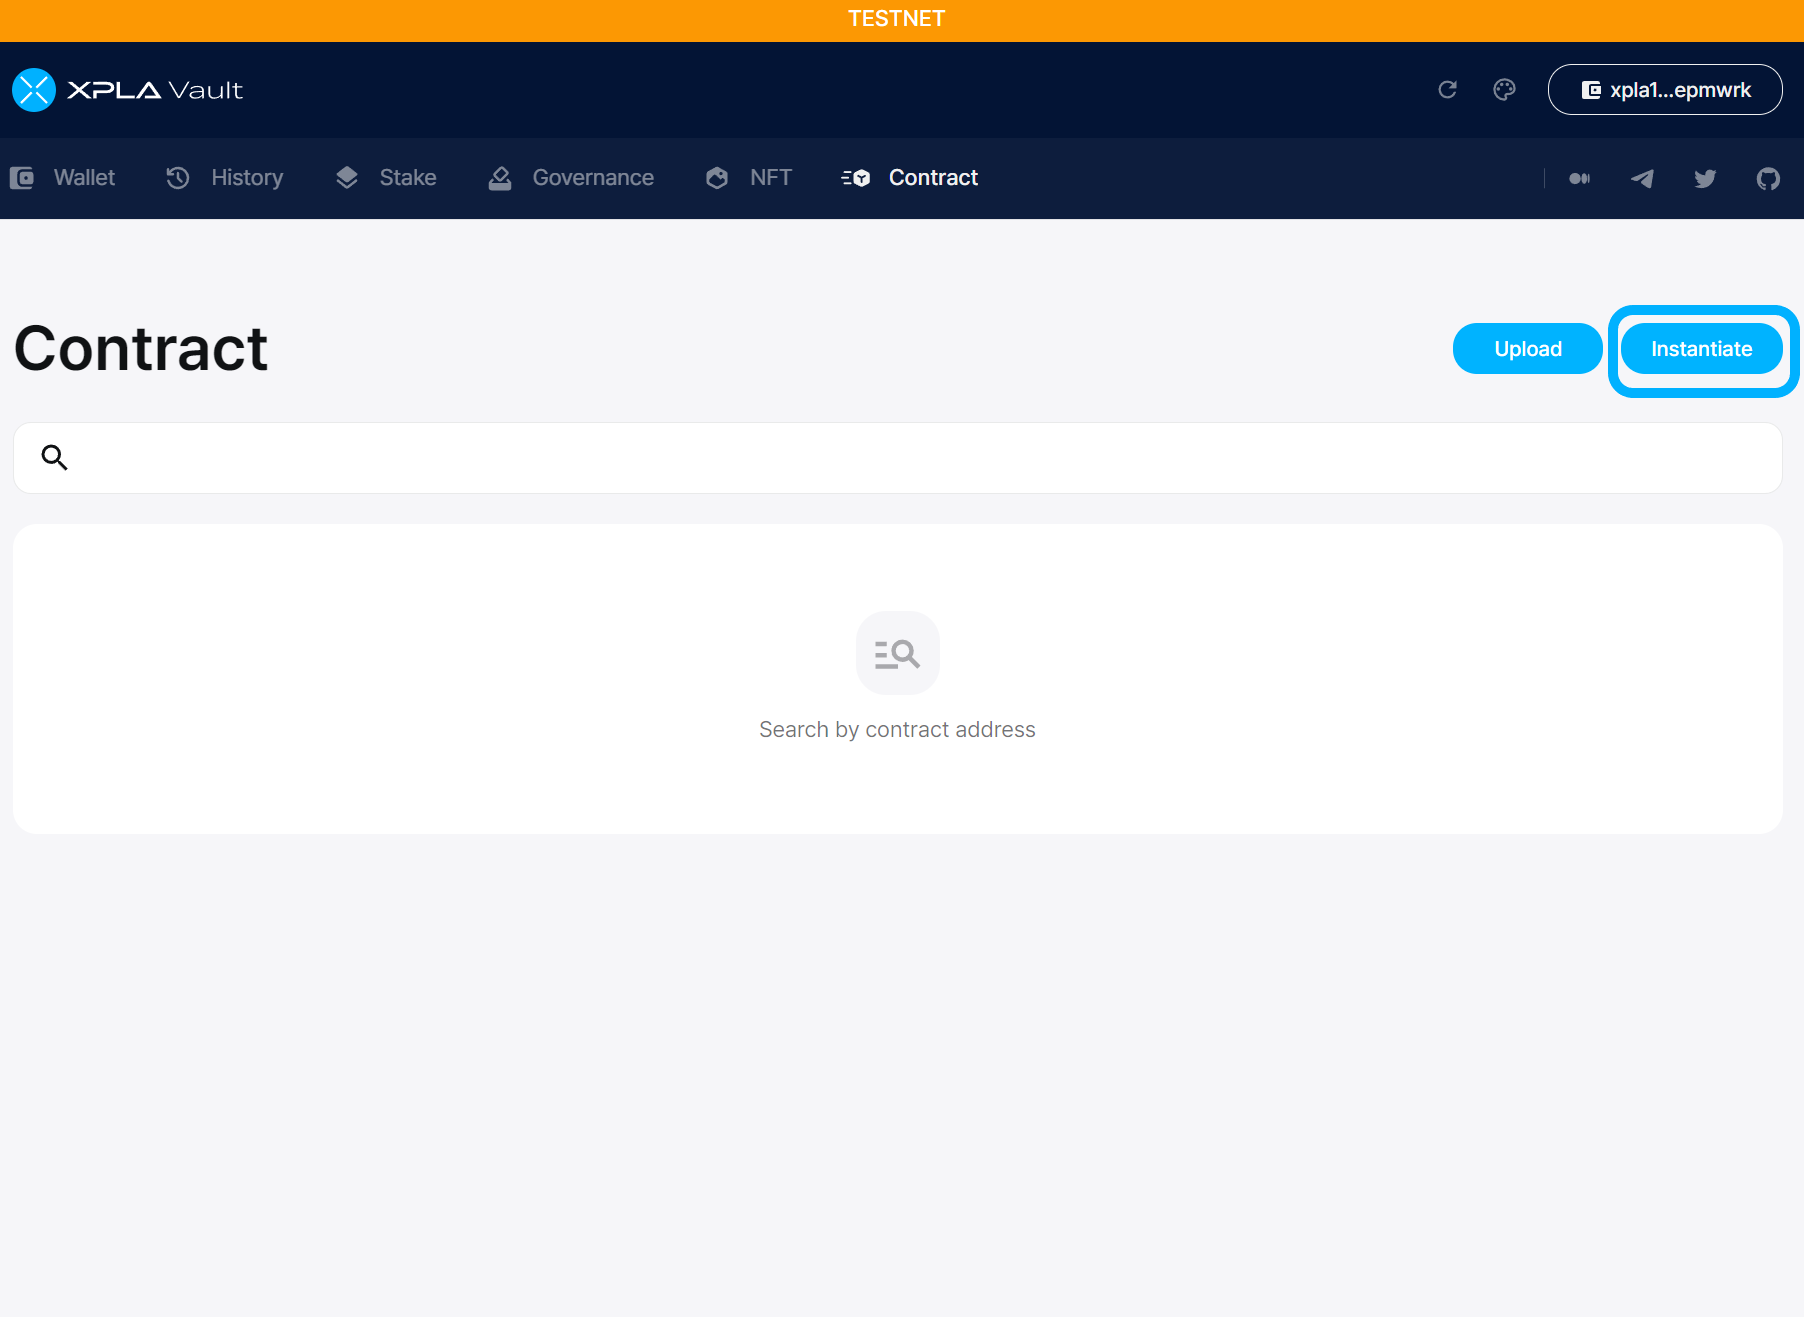
Create CW20 Contract
Click on the Contract menu on the Vault page.
Click on Instantiate
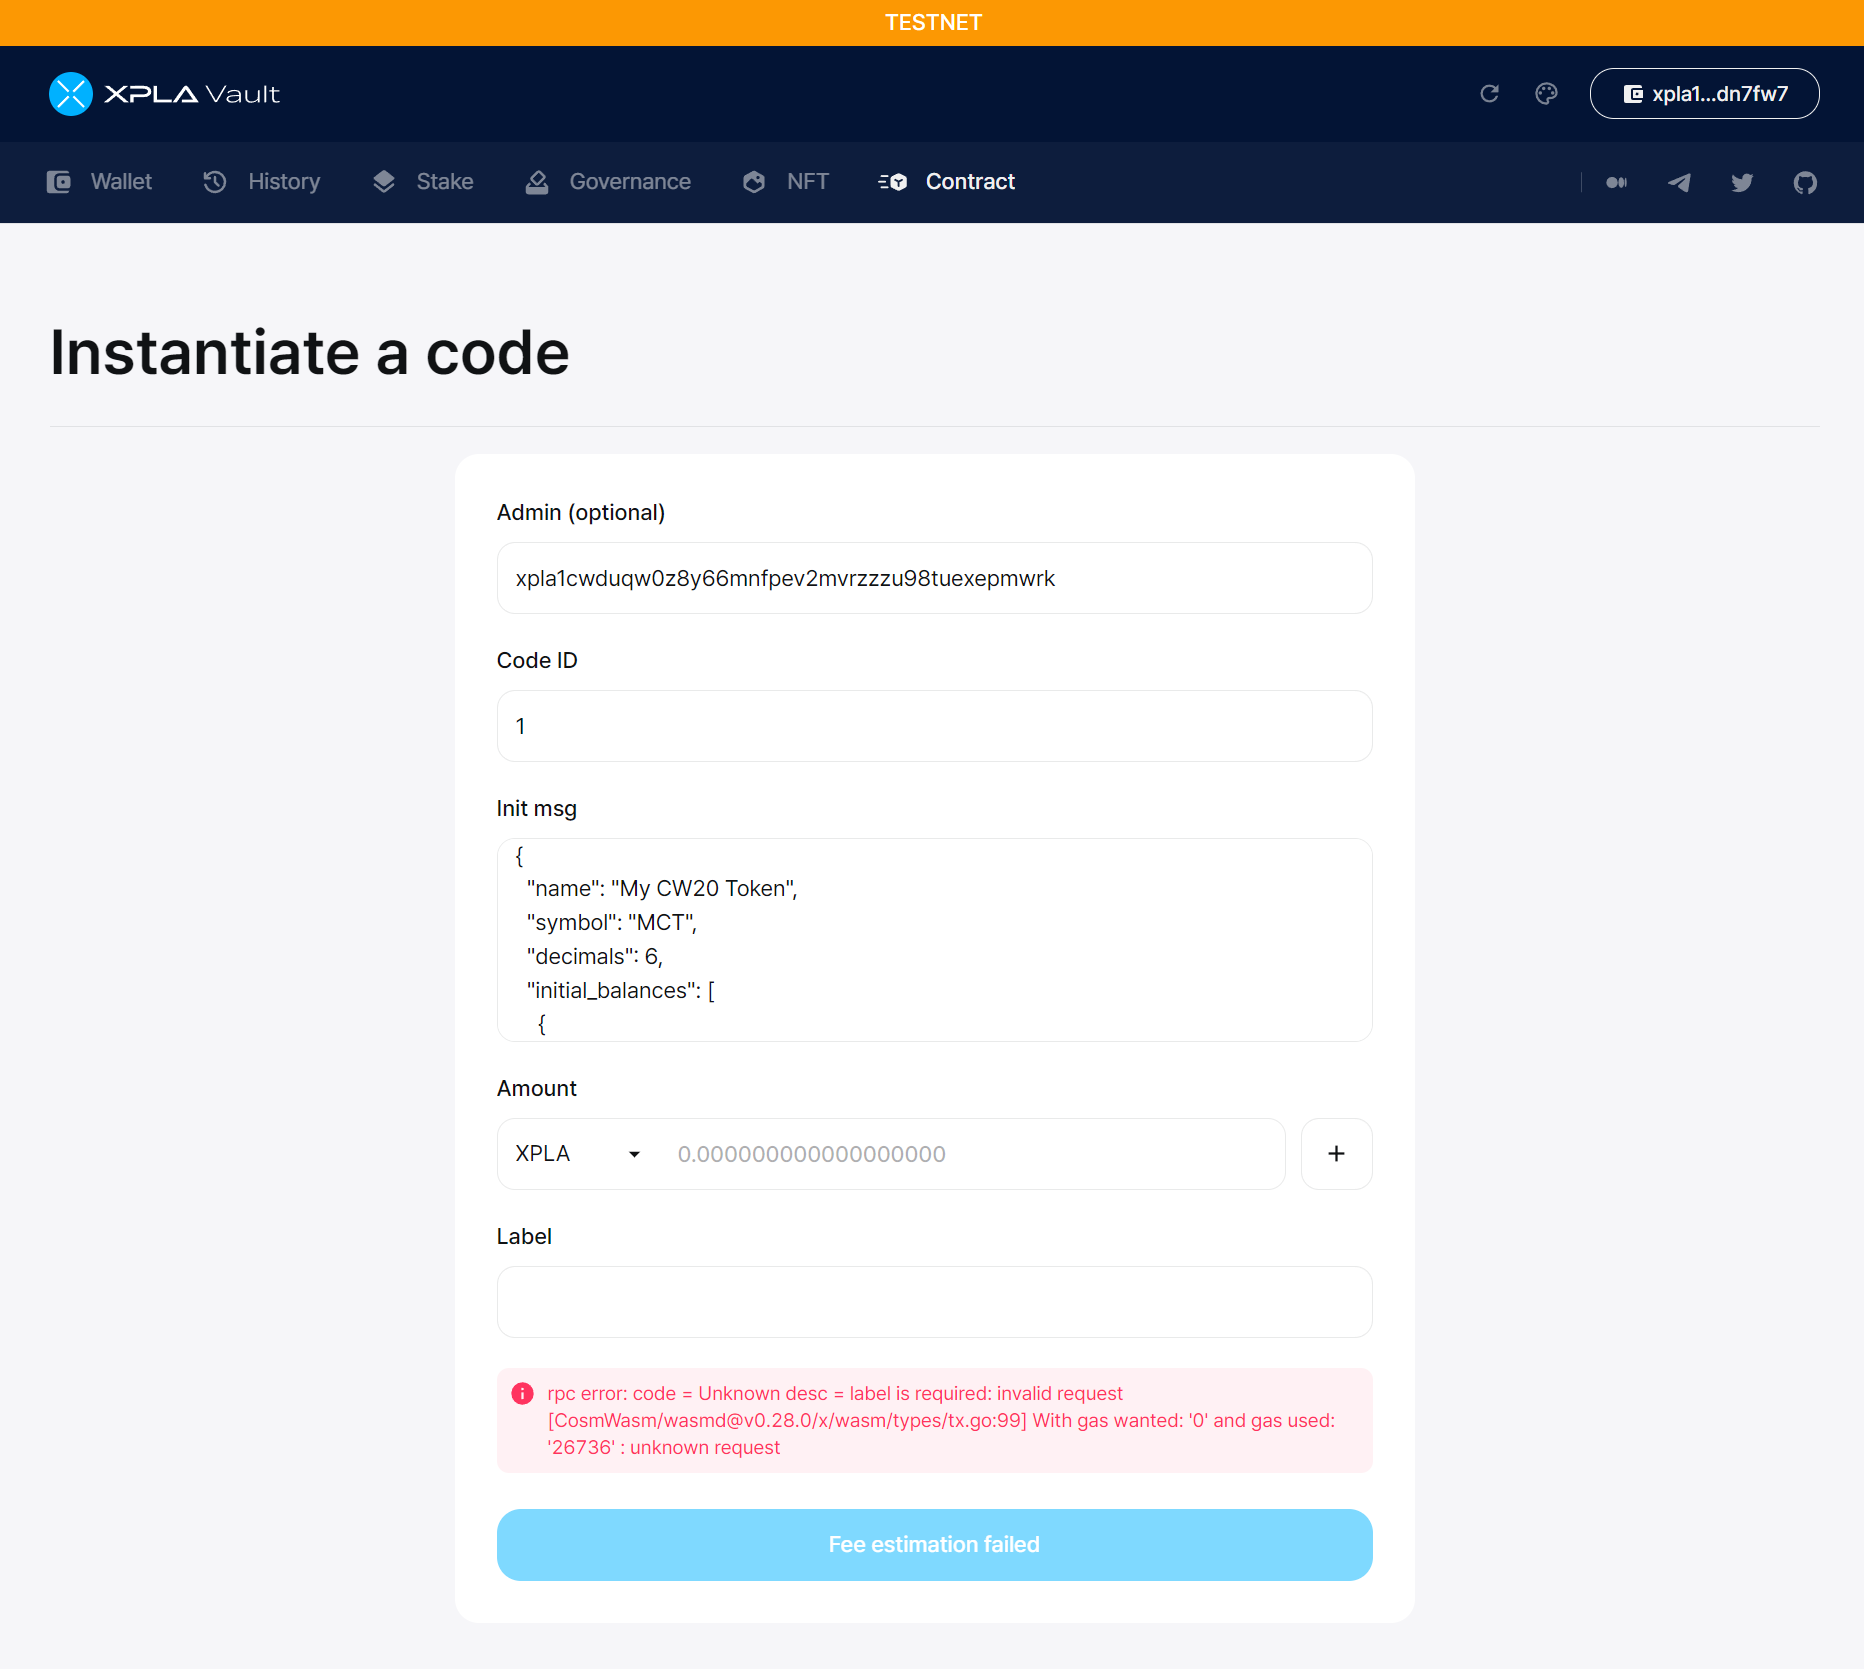
Admin here is the owner wallet address of the contract. The wallet address used in the instance below is xpla1cwduqw0z8y66mnfpev2mvrzzzu98tuexepmwrk.
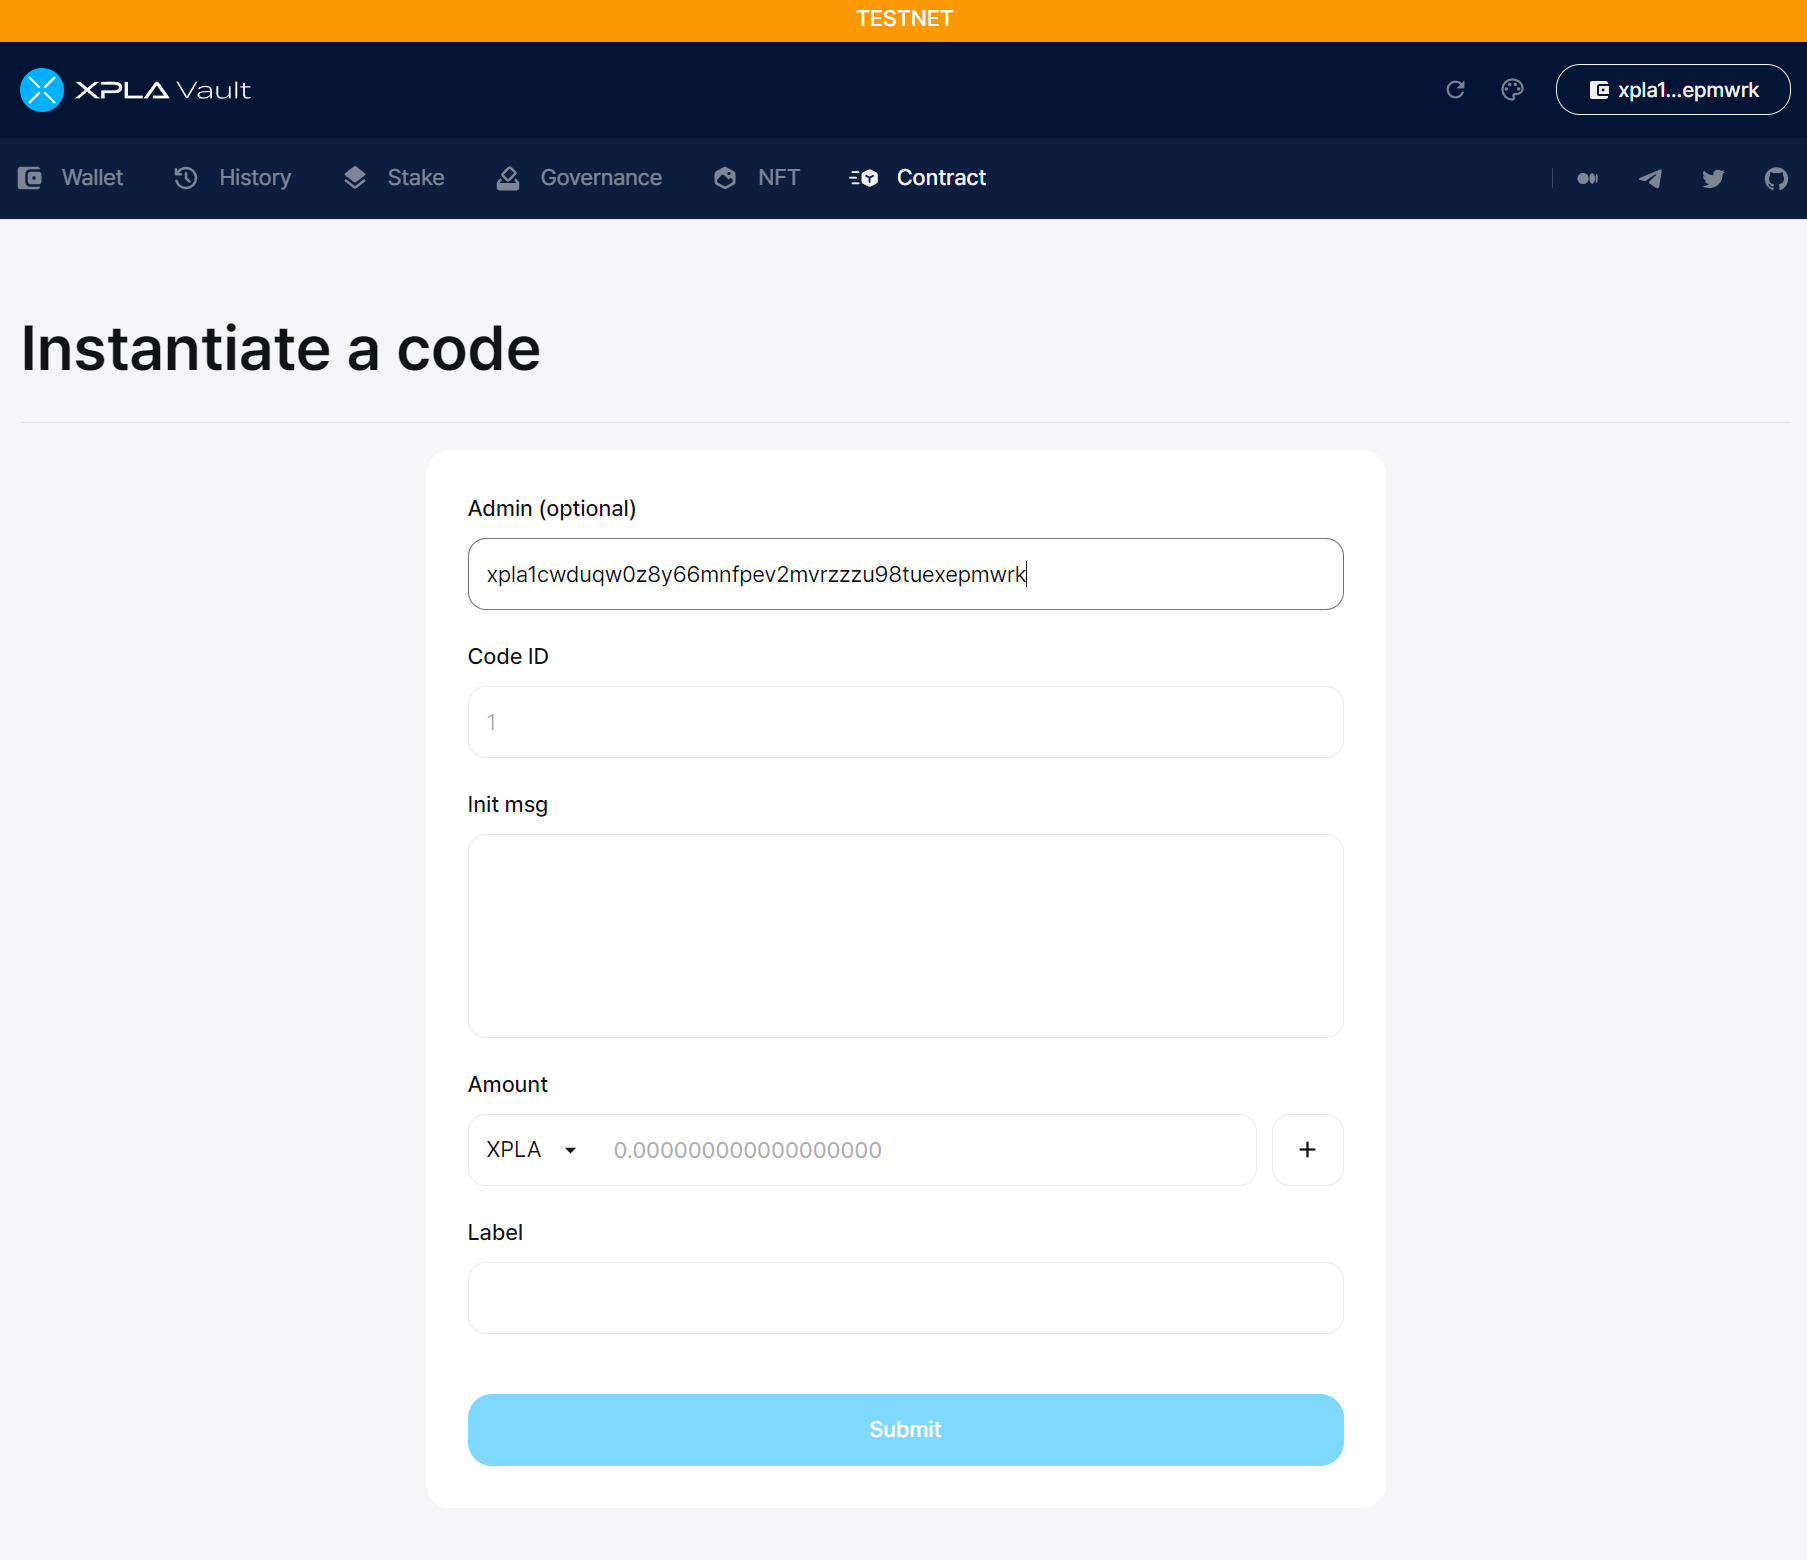
The Code ID for CW contract is 1, so type in 1.
Code ID?
Unlike EVM, the Code Deploy and Contract Creation do not go hand in hand in Cosmwasm. First, when you put your code onto the blockchain (StoreCode), you'll get a special number called a Code ID for that code. Afterward, you can use this Code ID to make a contract (InstantiateContract).
All the contracts made with the same Code ID are based on the same original code. The only difference is that if you provide different starting values (init_msg) when making the contract, the specific details of the contract will be different. For more detailed information, you can take a look at the XPLA Docs.
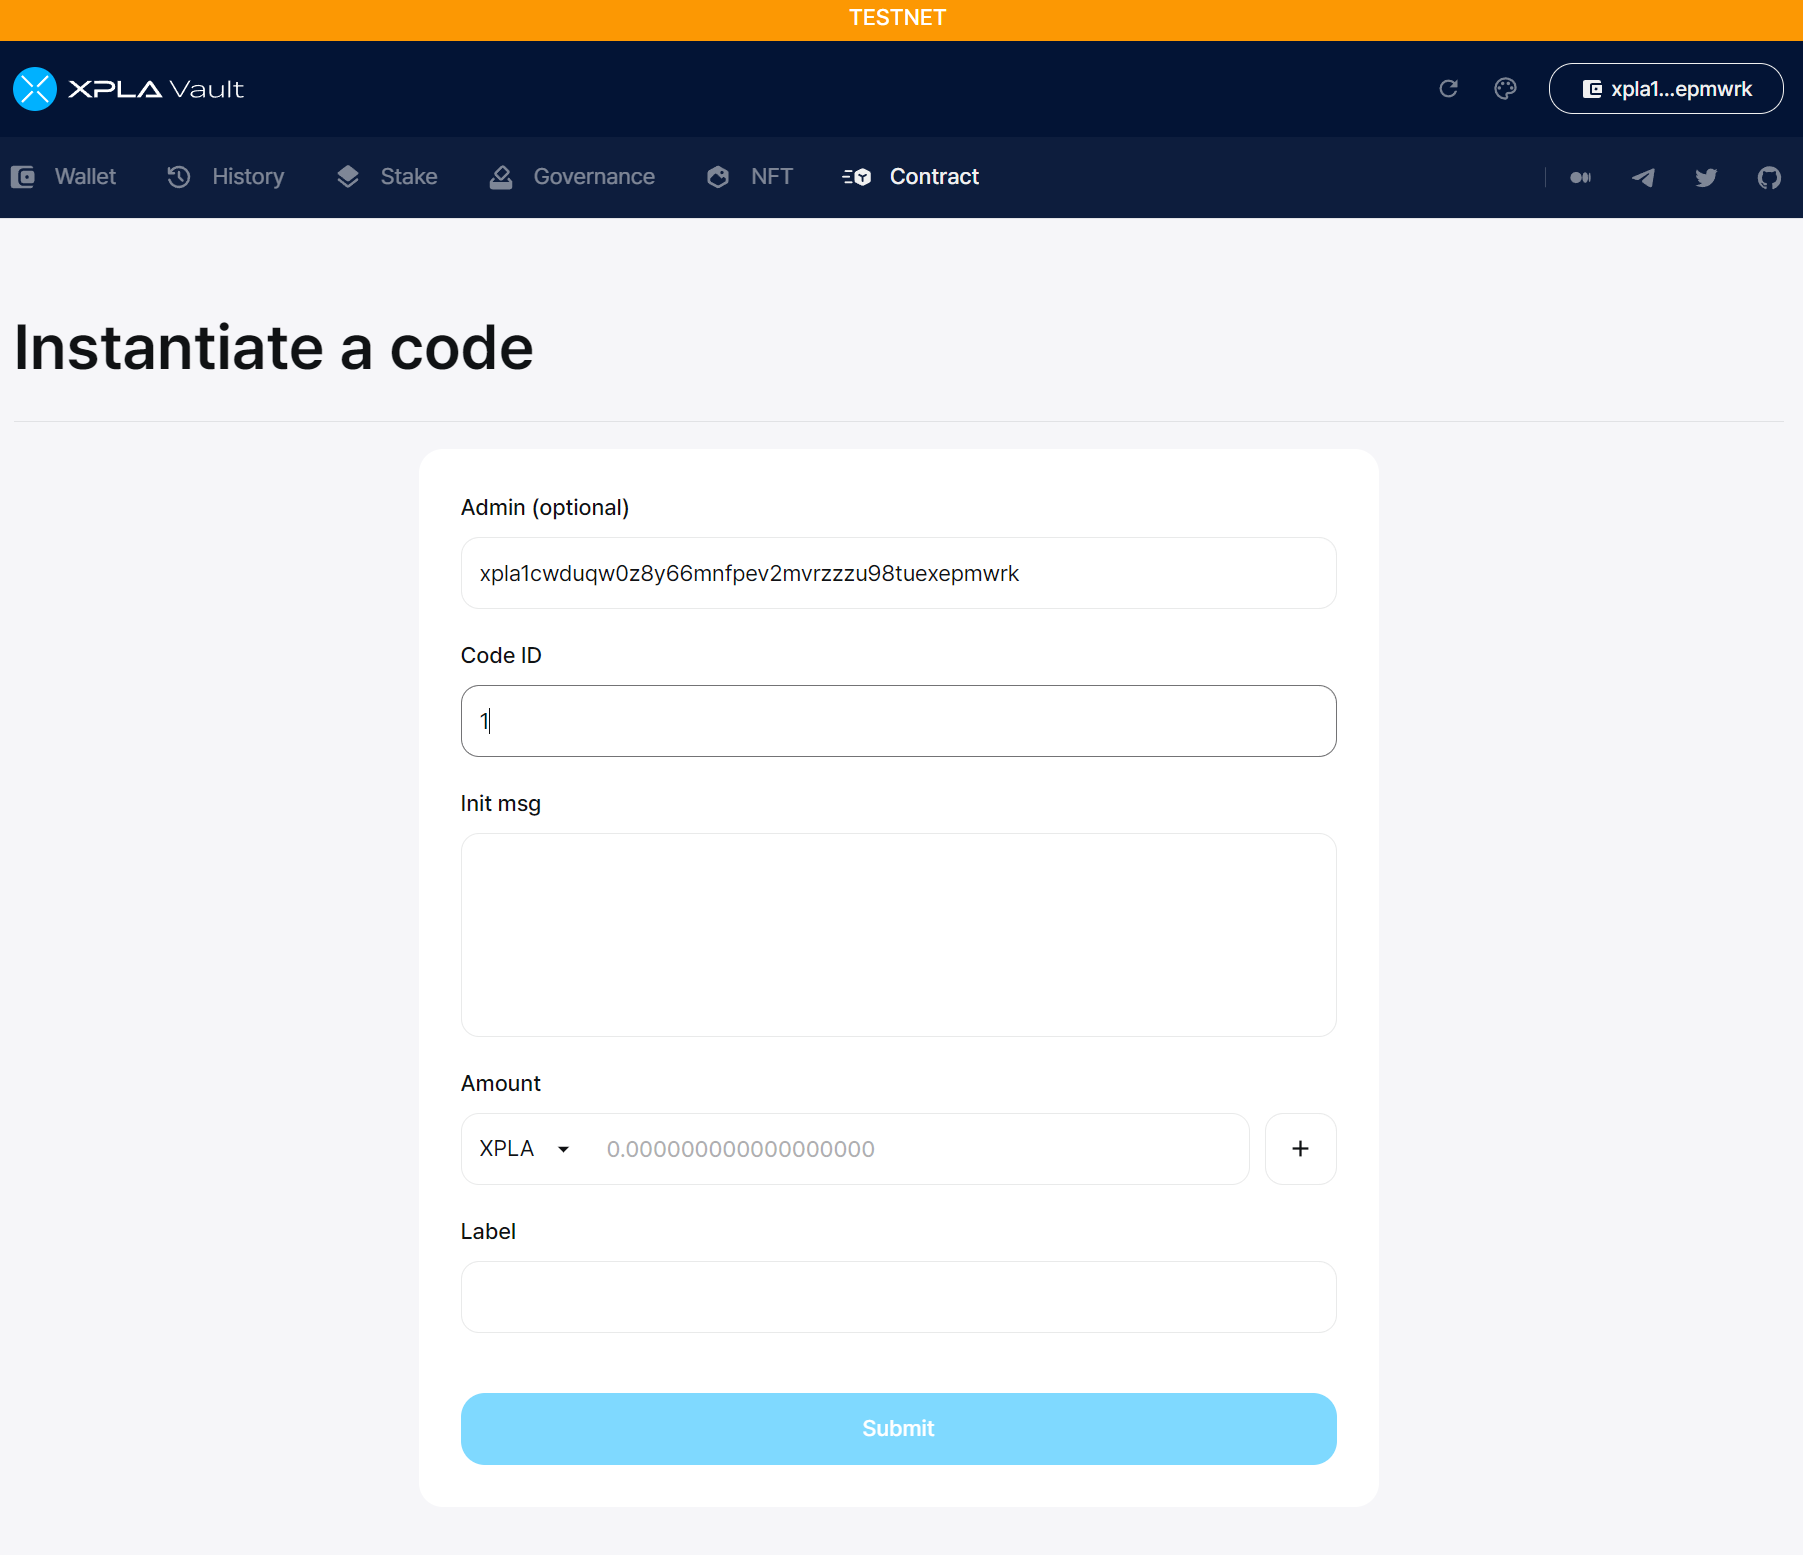
You need to provide the initial values for the contract in the Init msg. These initial values contain information about the tokens you're issuing. You can see details like who the issuer is (minter), how many tokens will be initially issued to which wallet (initial_balances), and what's the unit of the token (symbol).
For the example, please input in the following format. You should put your own wallet address in the minter and address fields. If you want to change the name, symbol, or amount, you can replace those values with different ones.
{
  "name": "My CW20 Token",
  "symbol": "MCT",
  "decimals": 6,
  "initial_balances": [
    {
      "address": "xpla1cwduqw0z8y66mnfpev2mvrzzzu98tuexepmwrk",
      "amount": "2000000000000000"
    }
  ],
  "mint": {
    "minter": "xpla1cwduqw0z8y66mnfpev2mvrzzzu98tuexepmwrk"
  }
}
You can freely set the decimals value when issuing tokens. In the example initial values, we've set the decimals field to 6. Just to let you know, in the case of $XPLA, the standard decimals value is 18. This means that 1018 aXPLA is equal to 1 XPLA.
The Amount refers to the amount of $XPLA you want to send to the contract when carrying out the contract instantiate. Since the CW20 contract doesn't need to hold $XPLA coins, you can skip this part.
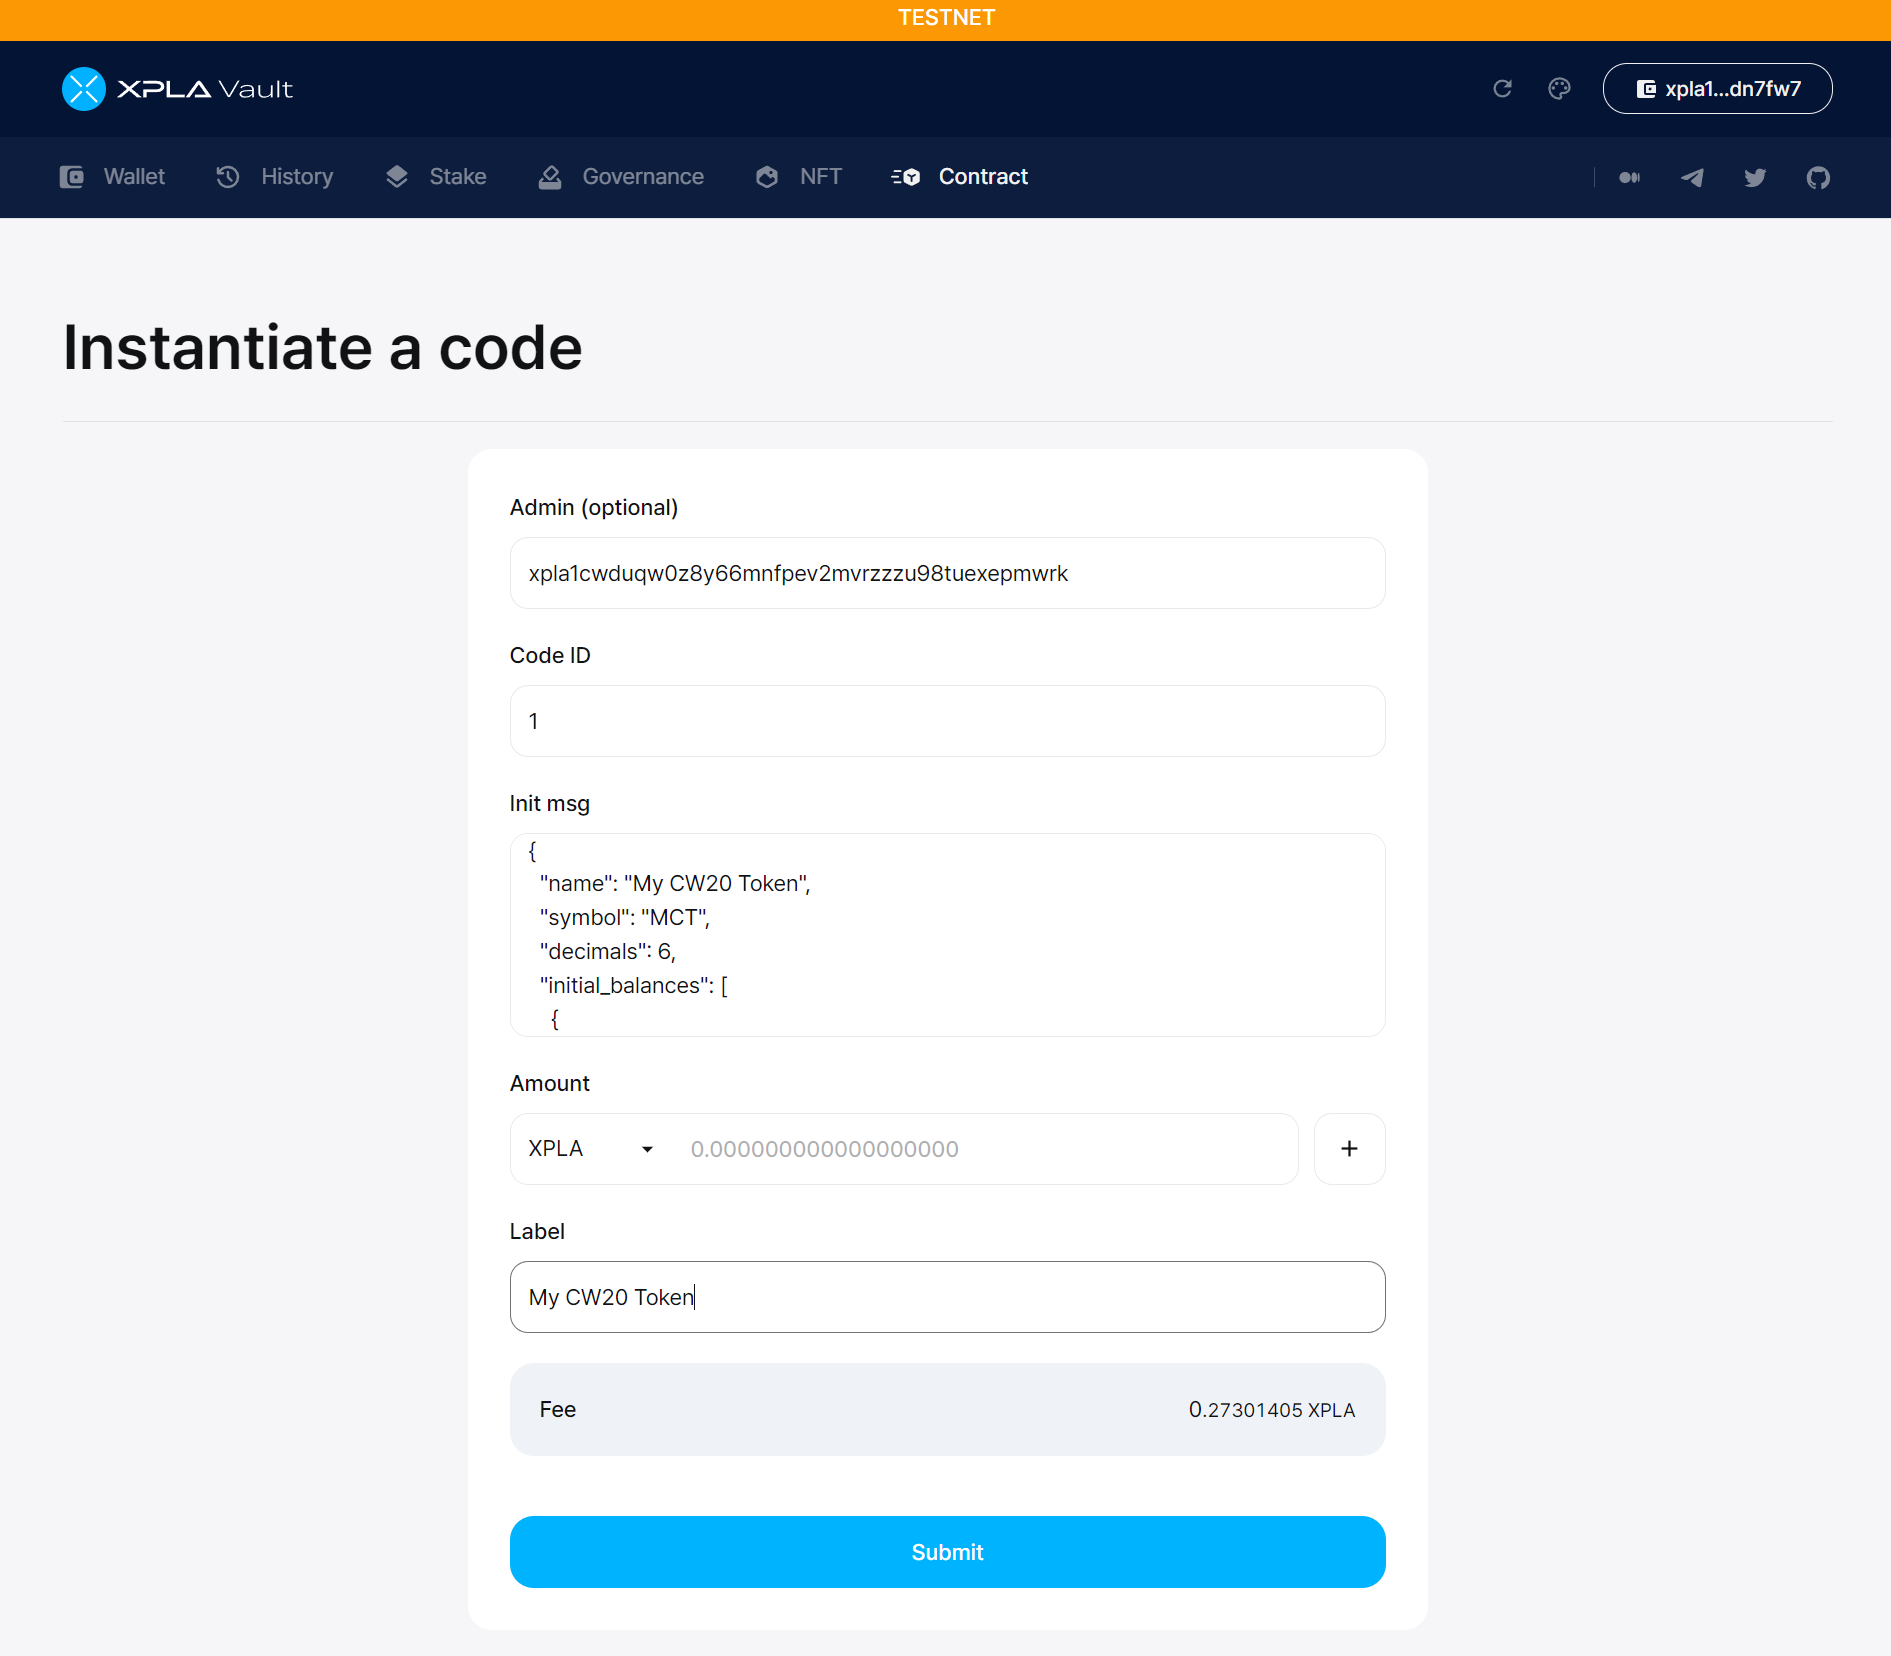
The Label is a description of the contract's function. In the example, we will write My CW20 Token as the label. Then, please proceed by clicking the "Submit" button.
If you're unsure about what values to input for each field when you want to instantiate a contract, you can refer to contracts instantiated with the same Code ID. For instance, let's look at another CW20 contract with Code ID 1 on the XPLA Explorer. By referring to the Init Msg value and adjusting the content according to your preferences, you can easily create a contract.
When you press the "Submit" button, a popup will appear in the Chrome Extension Vault app. At this point, if you enter your password, you'll be signing the Instantiate Method transaction. Please input the password you set when creating the wallet and then click the "Post" button.

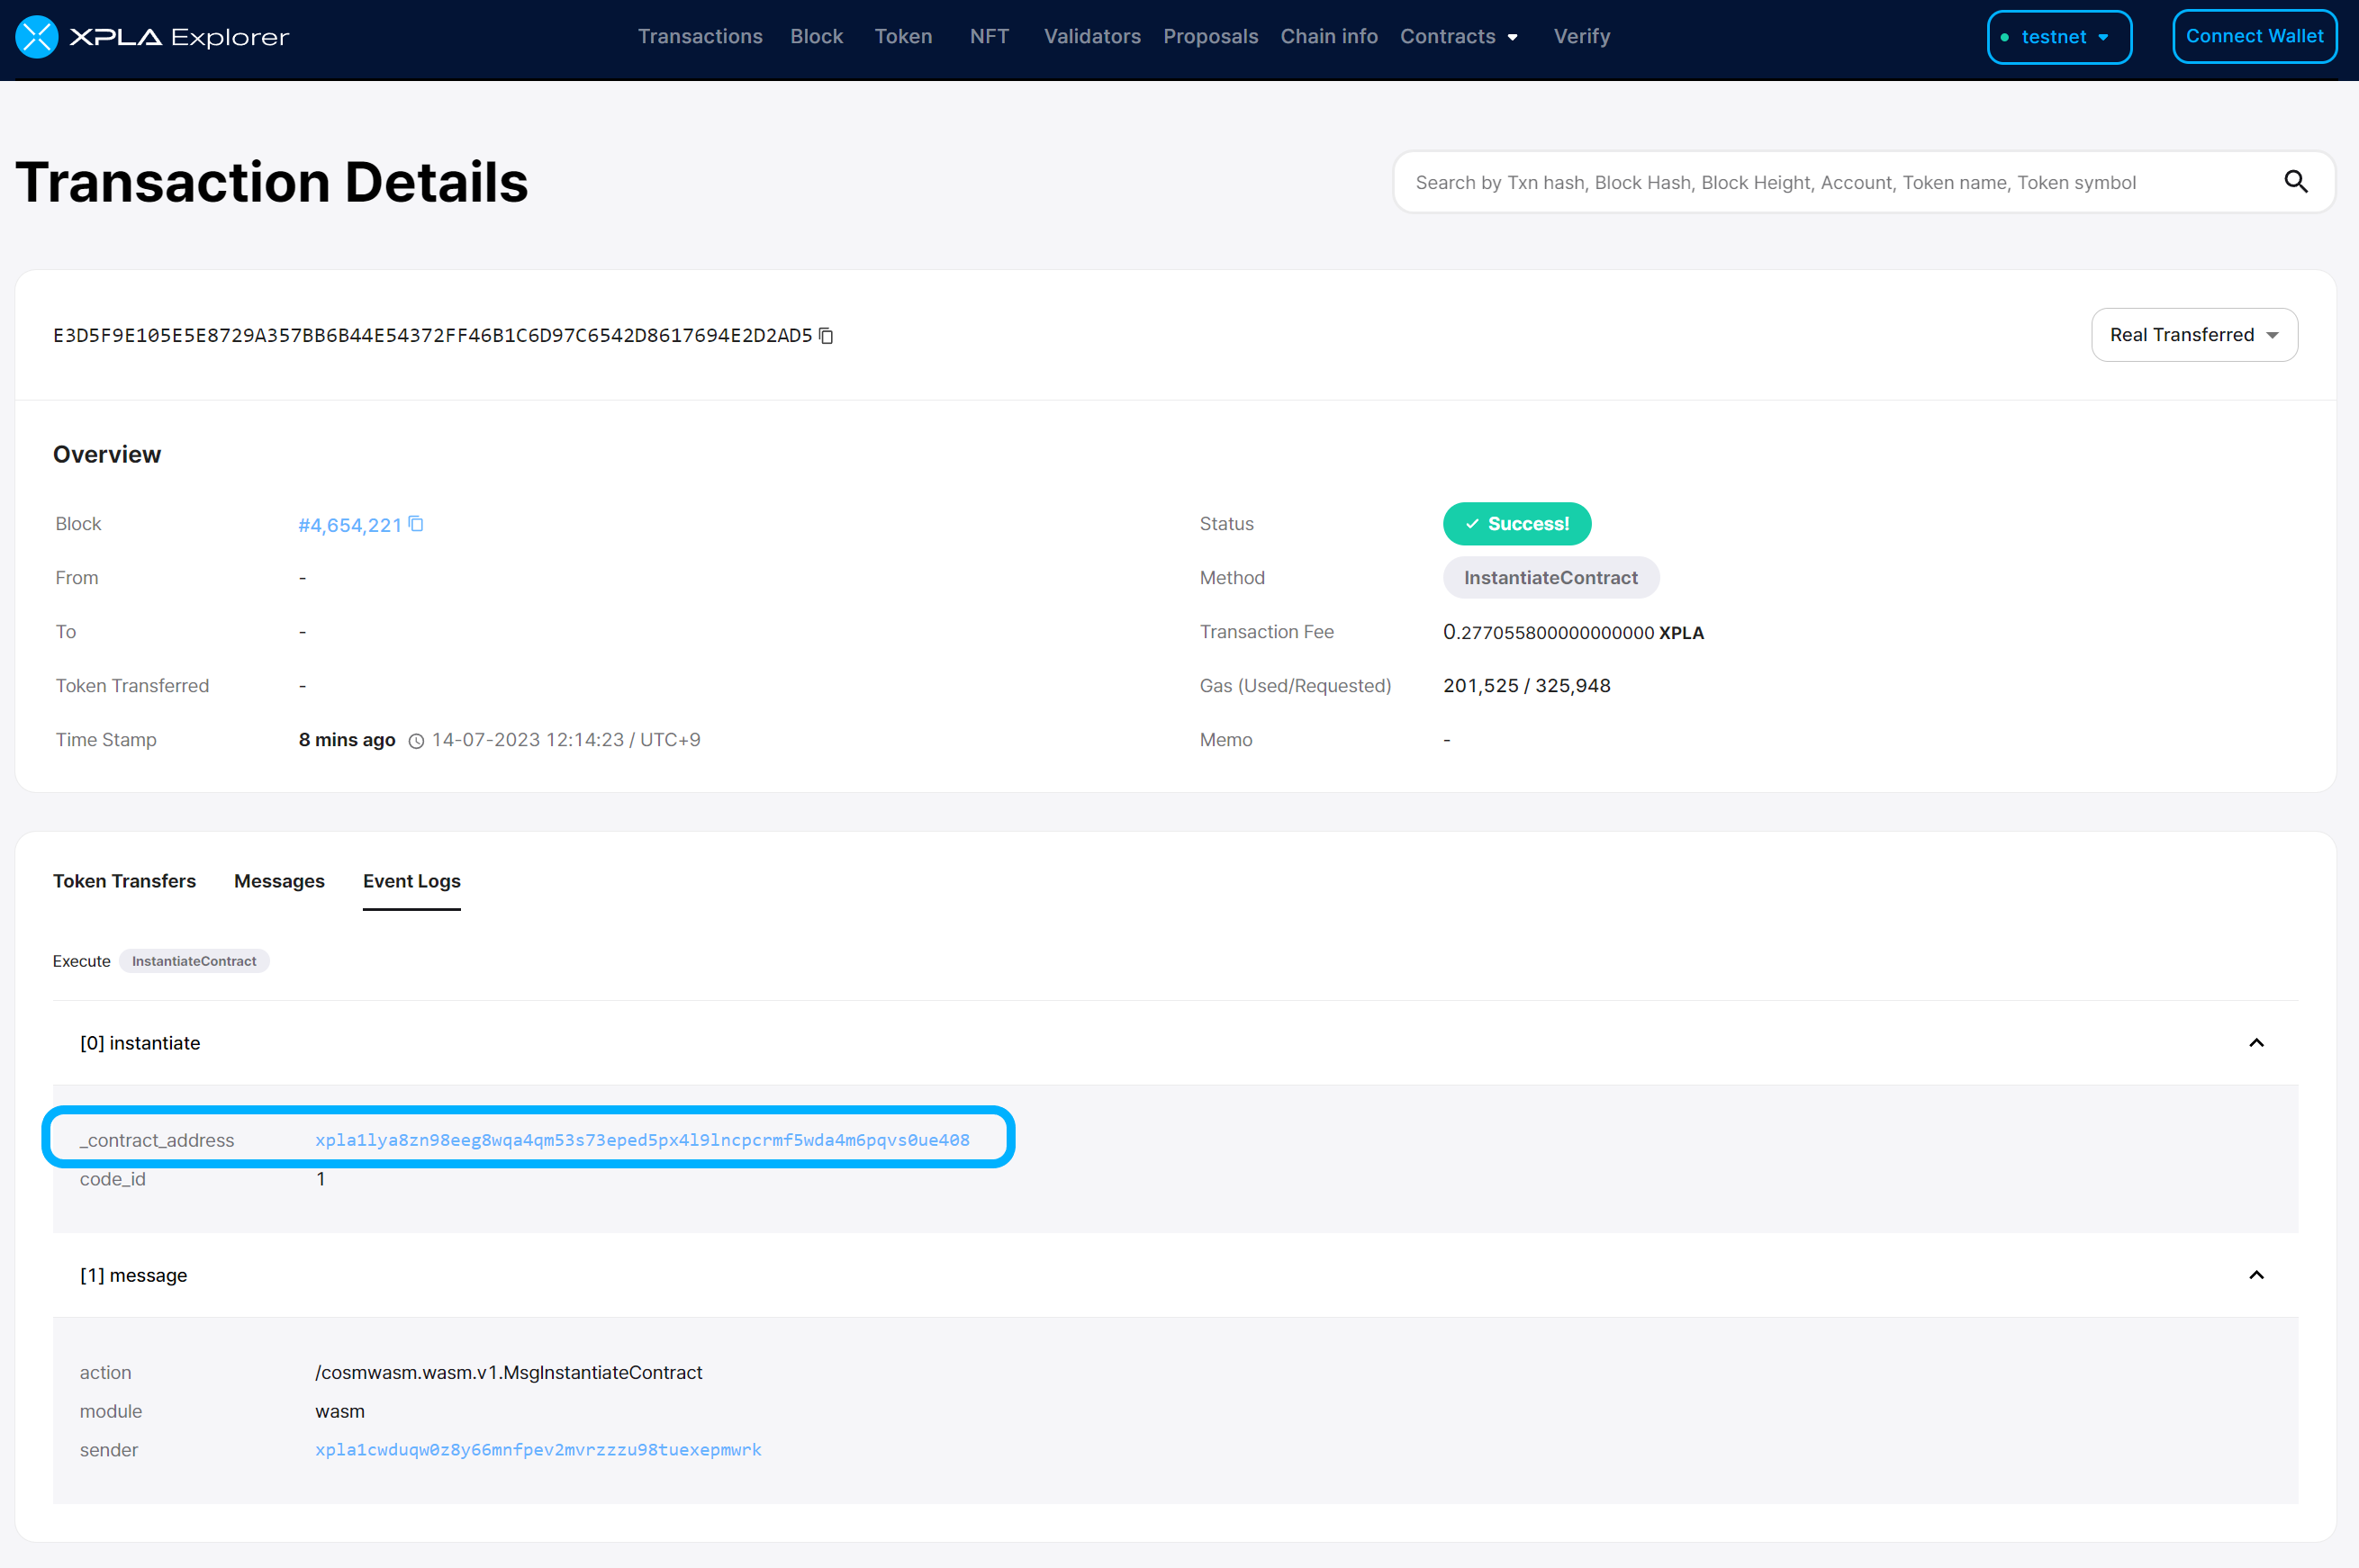
Once the signing is complete, you'll need to wait until the transaction is recorded on the XPLA blockchain. After the transaction is generated, you can check the transaction details on the XPLA Explorer. Try clicking on the Tx hash value to see more information.

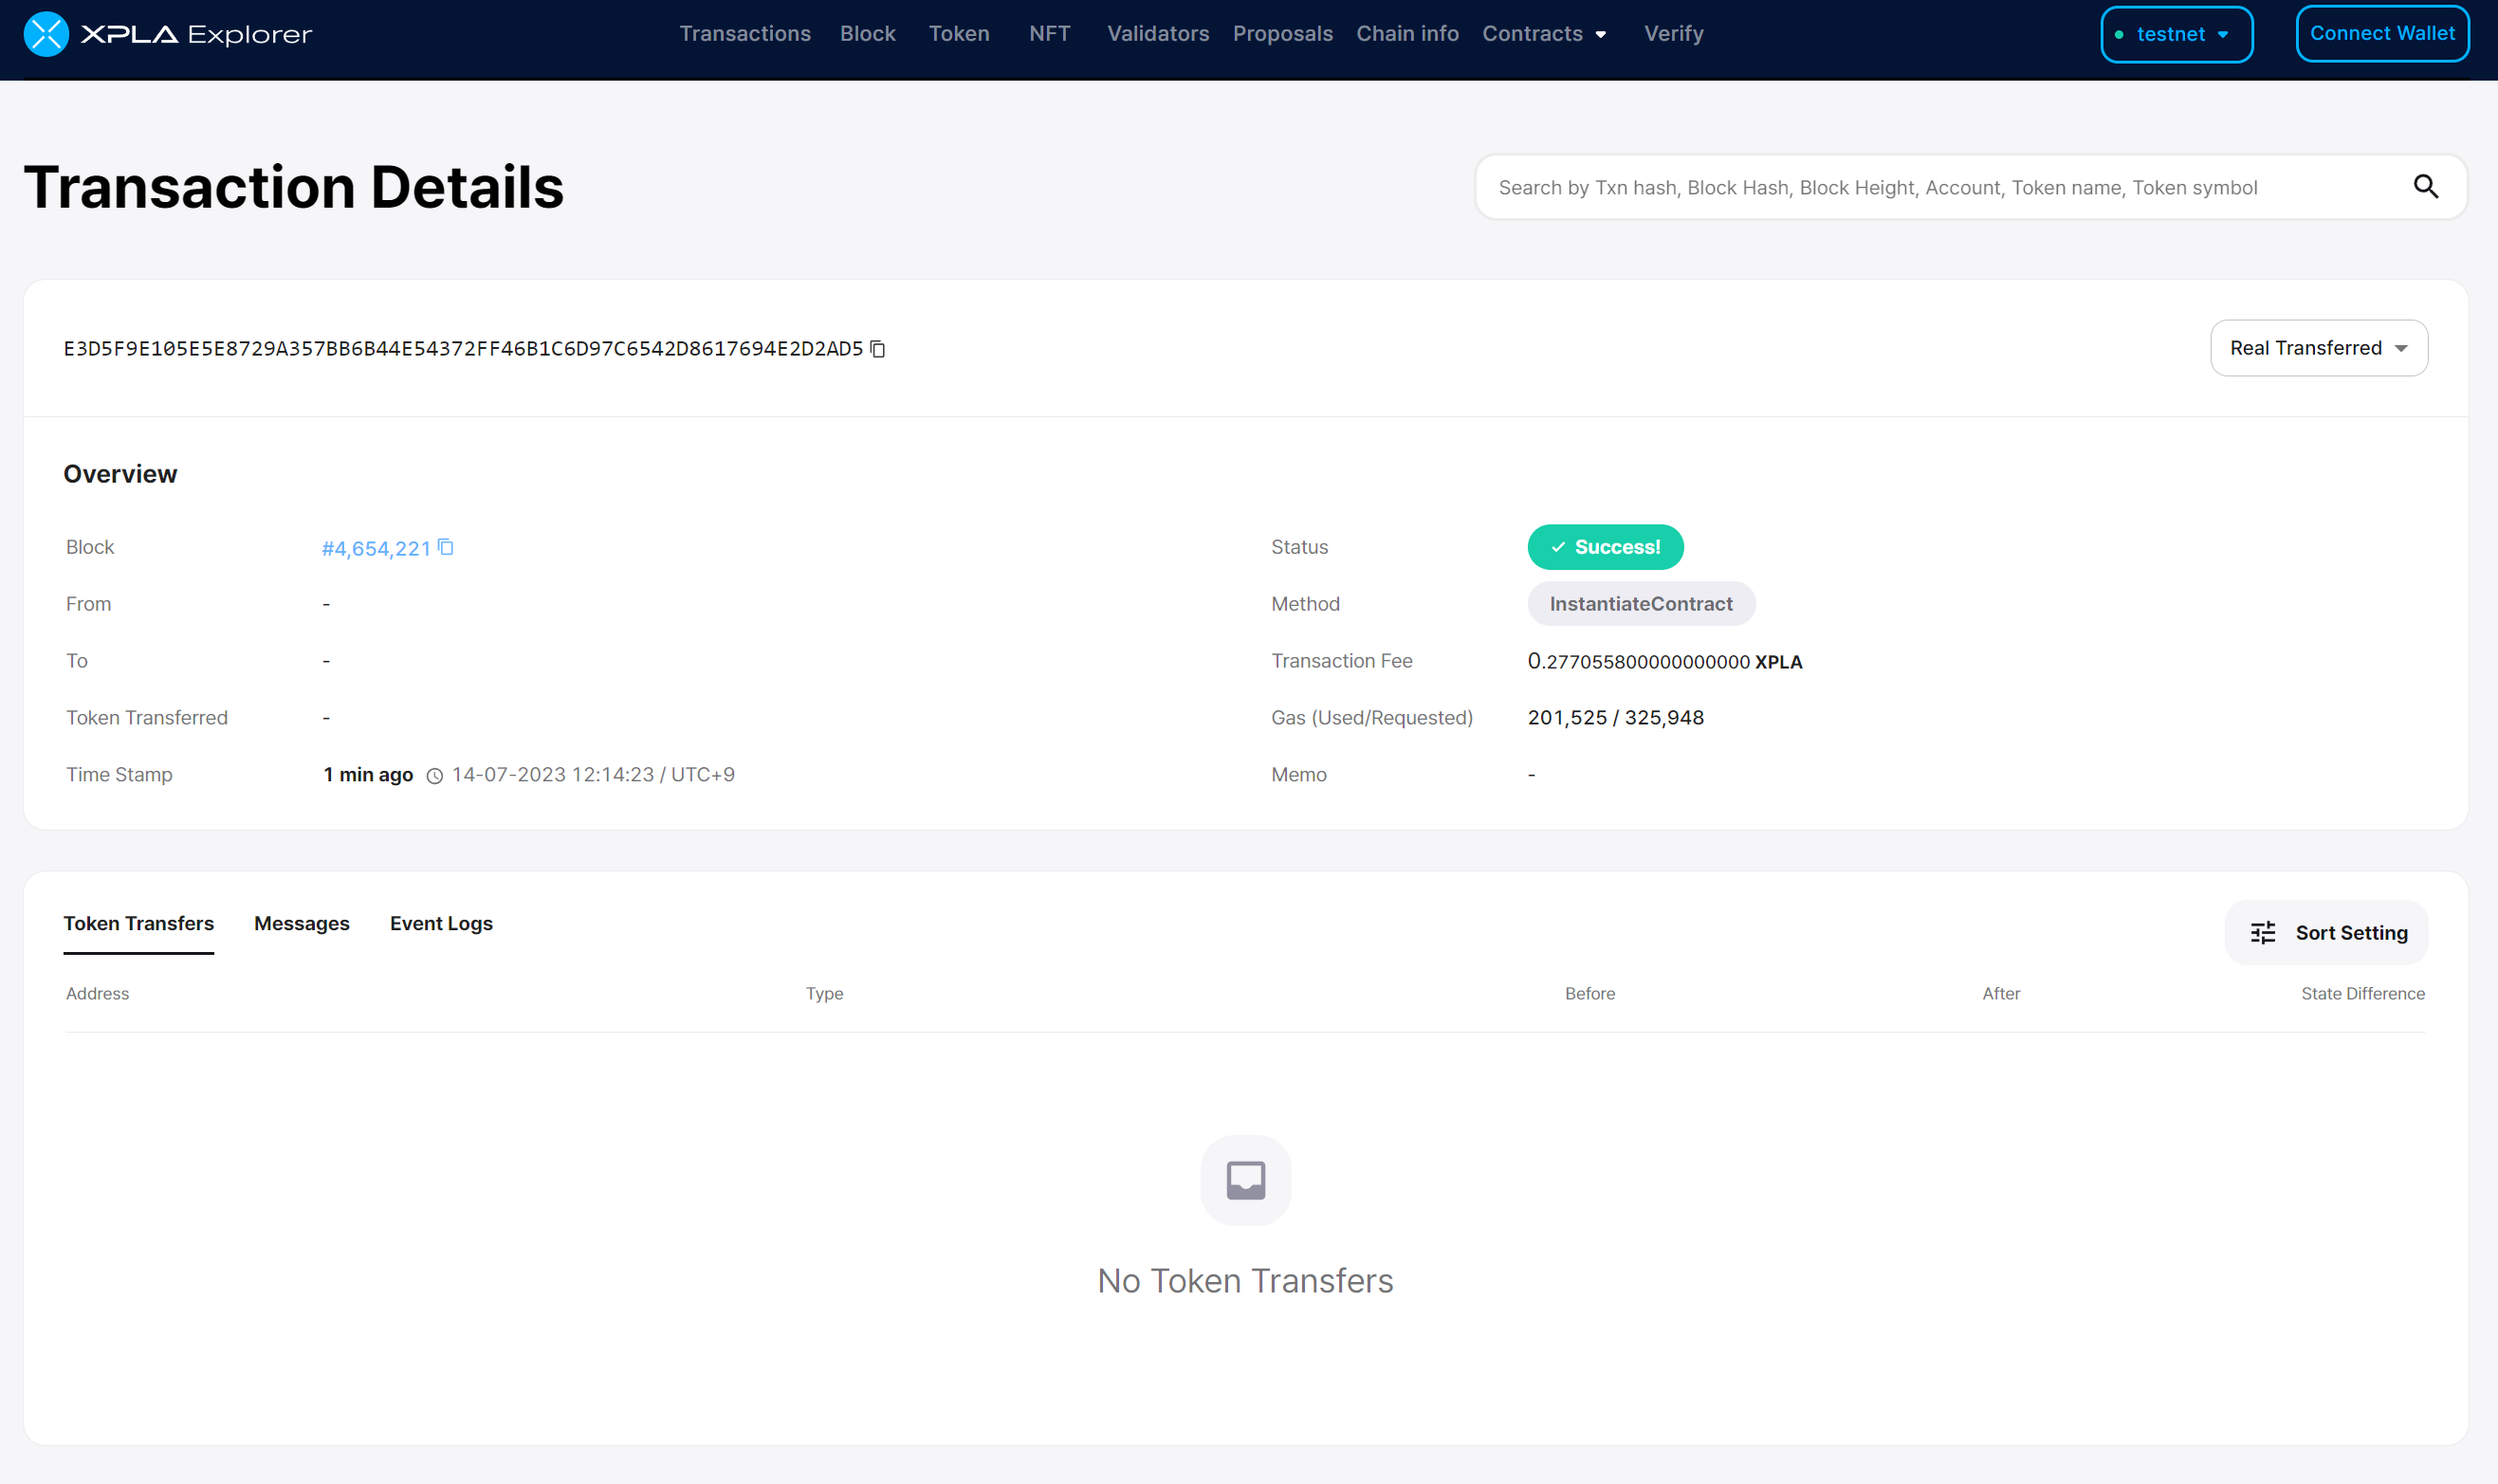
Confirm the Contract Creation
If the transaction went smoothly, you should be able to find the contract address of the CW20 token you issued in the EventLogs section.
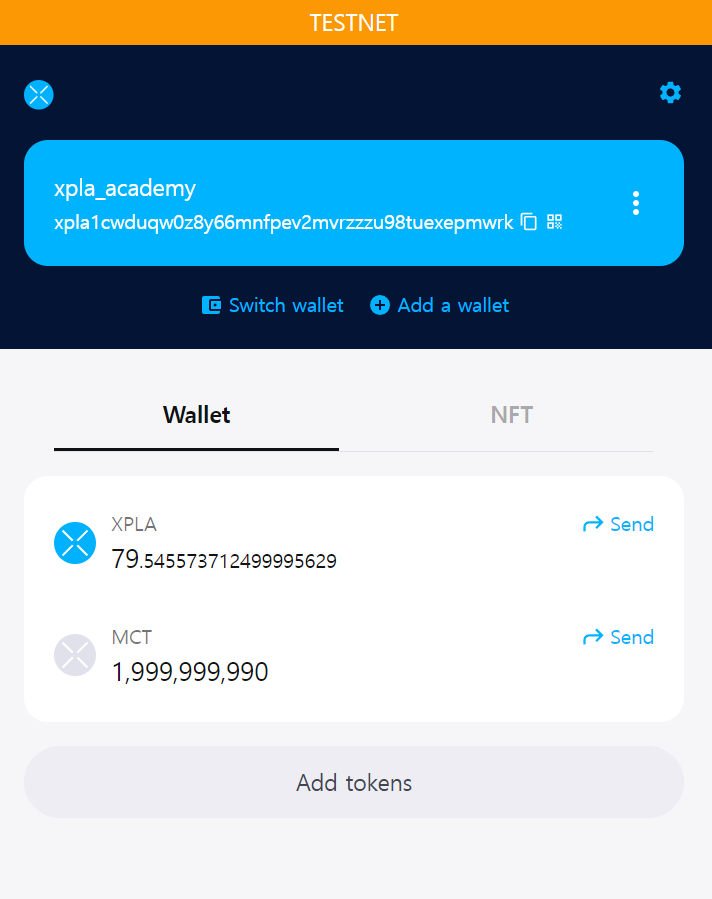
When you entered the Init msg value, you provided information in the initial_balances field about how many CW20 tokens to issue to which wallet. Therefore, you would need to check if the tokens were successfully received in that wallet. You can easily do this using Vault in the Chrome Extension app.
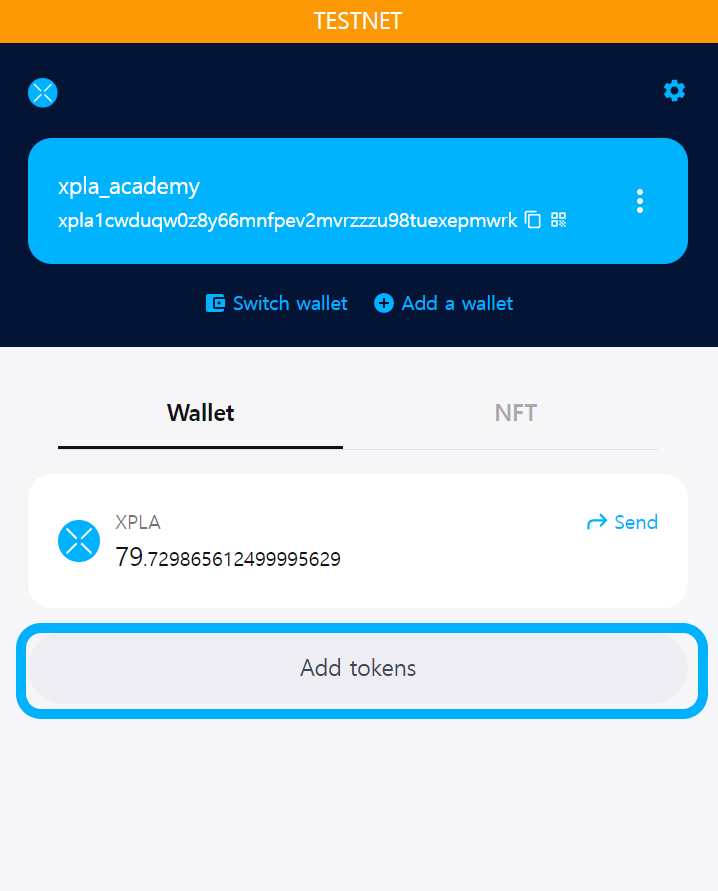
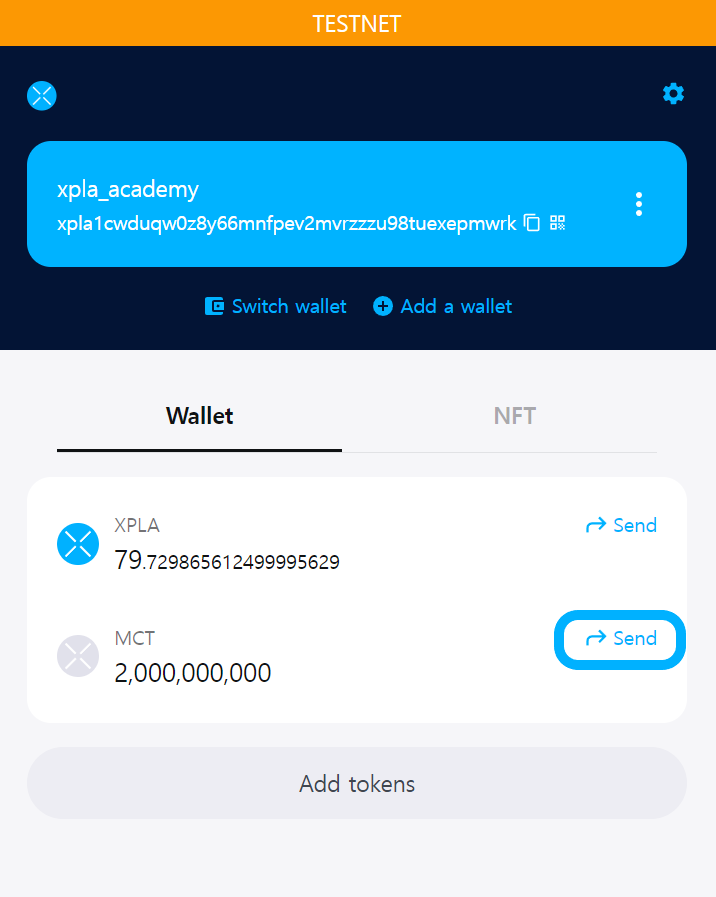
Please click on "Add tokens" in the Chrome Extension app Vault.
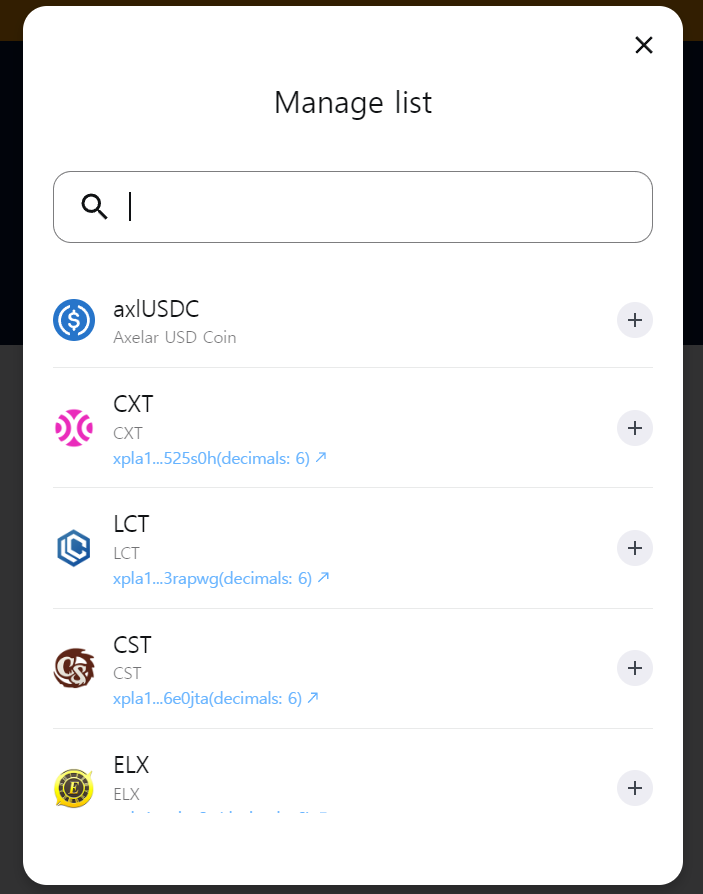
Please enter your CW20 token contract address in the search bar.
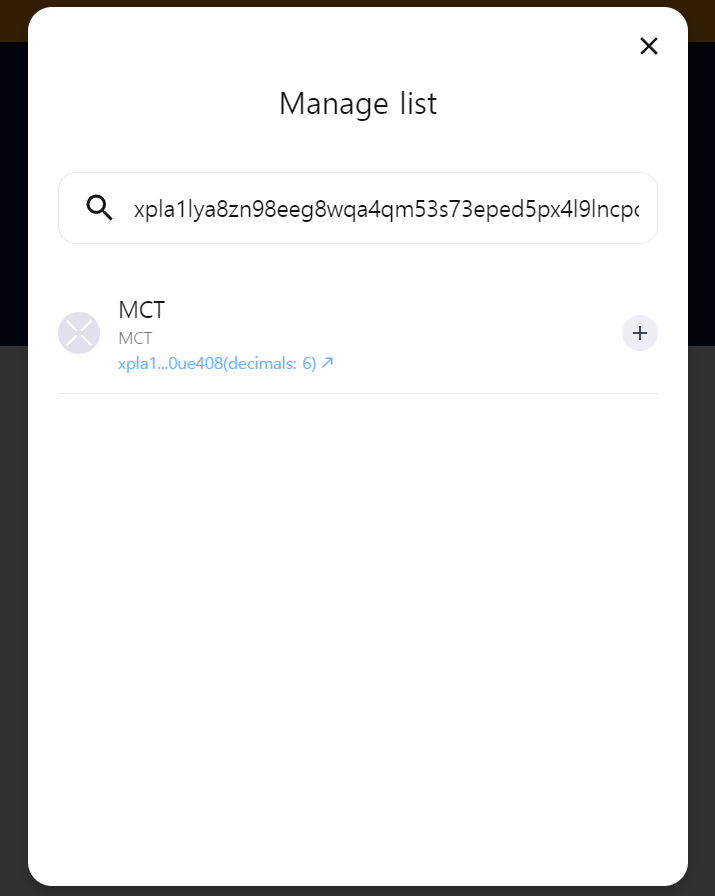
In this way, you can confirm whether the MCT tokens have been successfully issued using Vault!
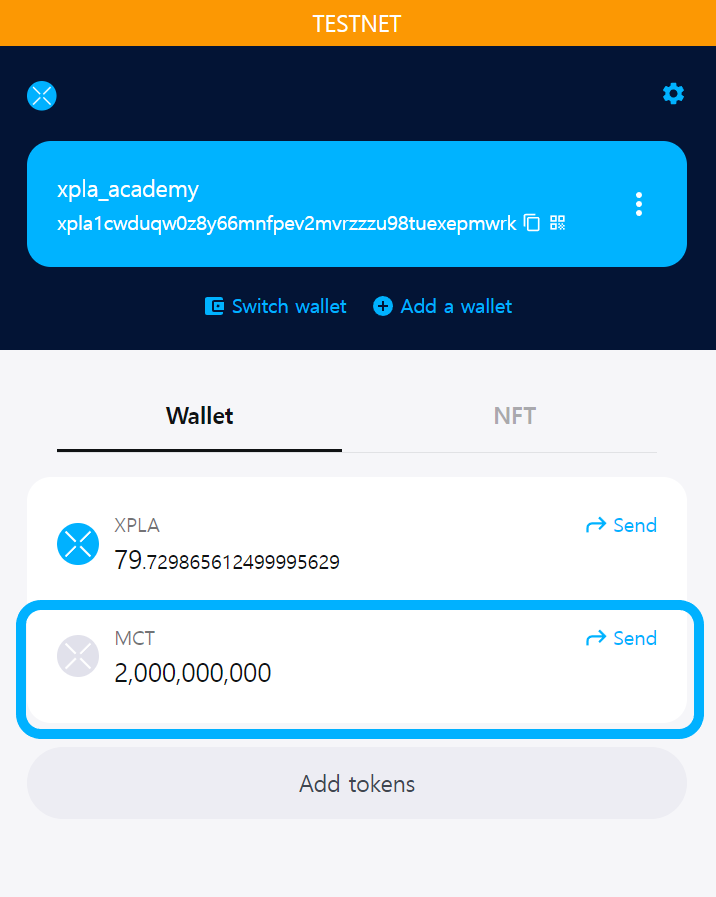
Even though the amount value is 2,000,000,000,000,000 in 'initial_balances,' why are there only 2,000,000,000 present?
When you're entering the amount value in "initial_balances", you need to think about the decimals section. Because the MCT token has a decimals value set to 6, we entered it as 2,000,000,000 * 106. So, it's correct that 2,000,000,000 units were issued properly.
Transfer CW20
Let's try transferring the issued CW20 token to another wallet. In the Chrome Extension app Vault, click on the Send button for the CW20 token you want to transfer.
Put the wallet address you want to send to in the "Recipient" field, and enter the amount you want to send in the "Amount" field. In the example, we're going to send 10 MCT to the wallet address xpla1f6hcc3hpxyg8rst9d5sg393e5jaj7453t0xmz8.
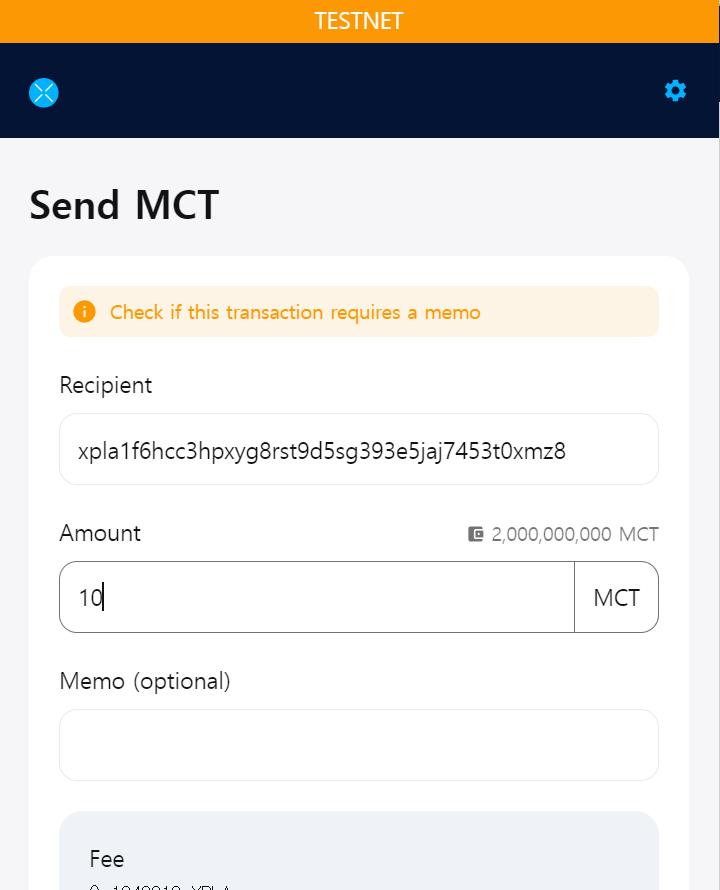
I skipped the Memo input, entered the password immediately and clicked the "Submit" button.
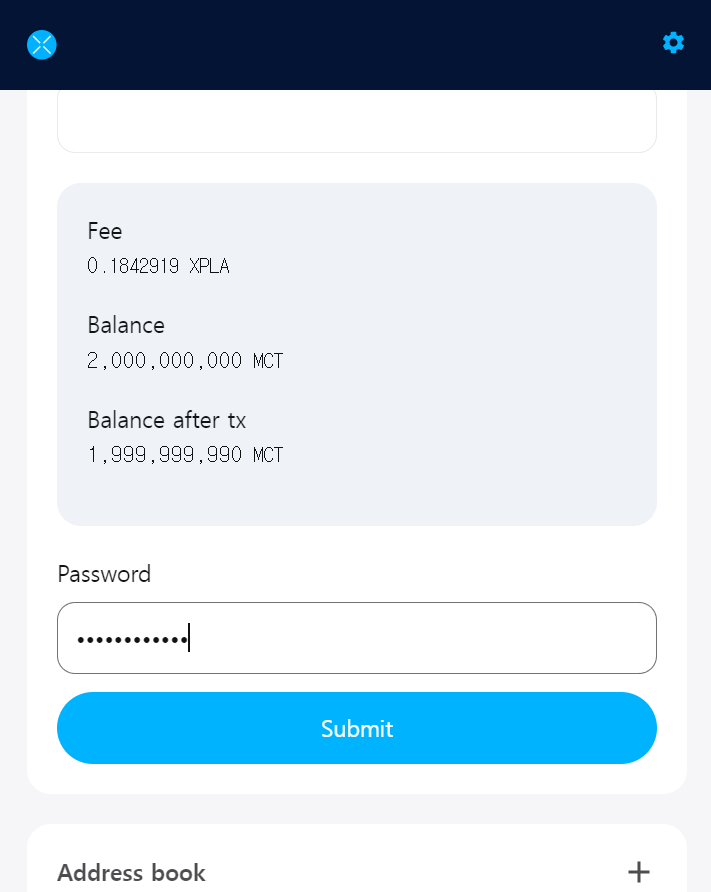
The transaction has been broadcasted. If you wait for the popup, you'll be able to see that the transaction has been successfully generated. At this point, if you click on the transaction hash value, you can check the CW20 transfer transaction on XPLA Explorer.
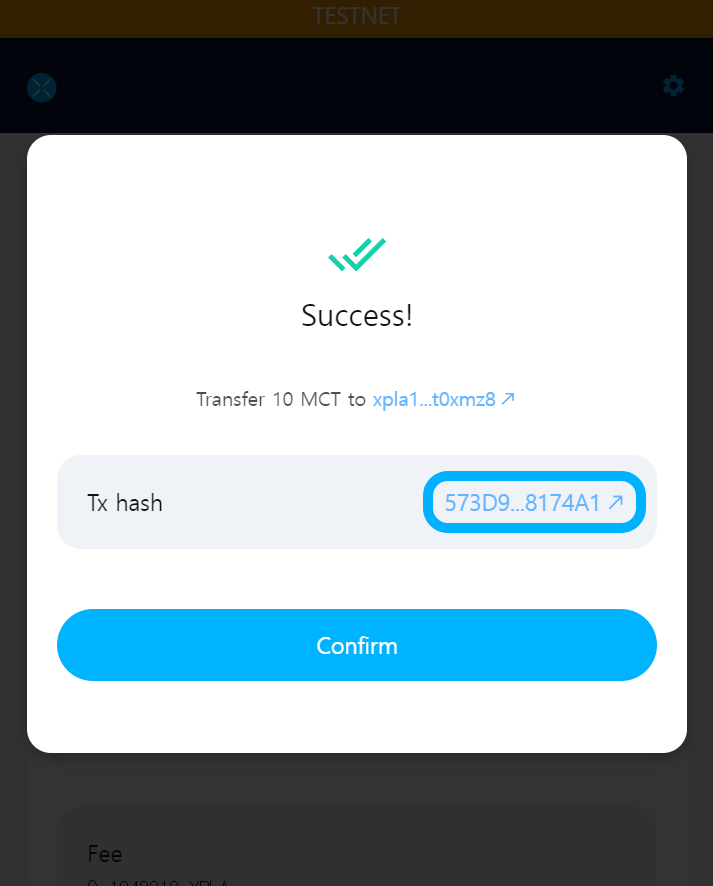
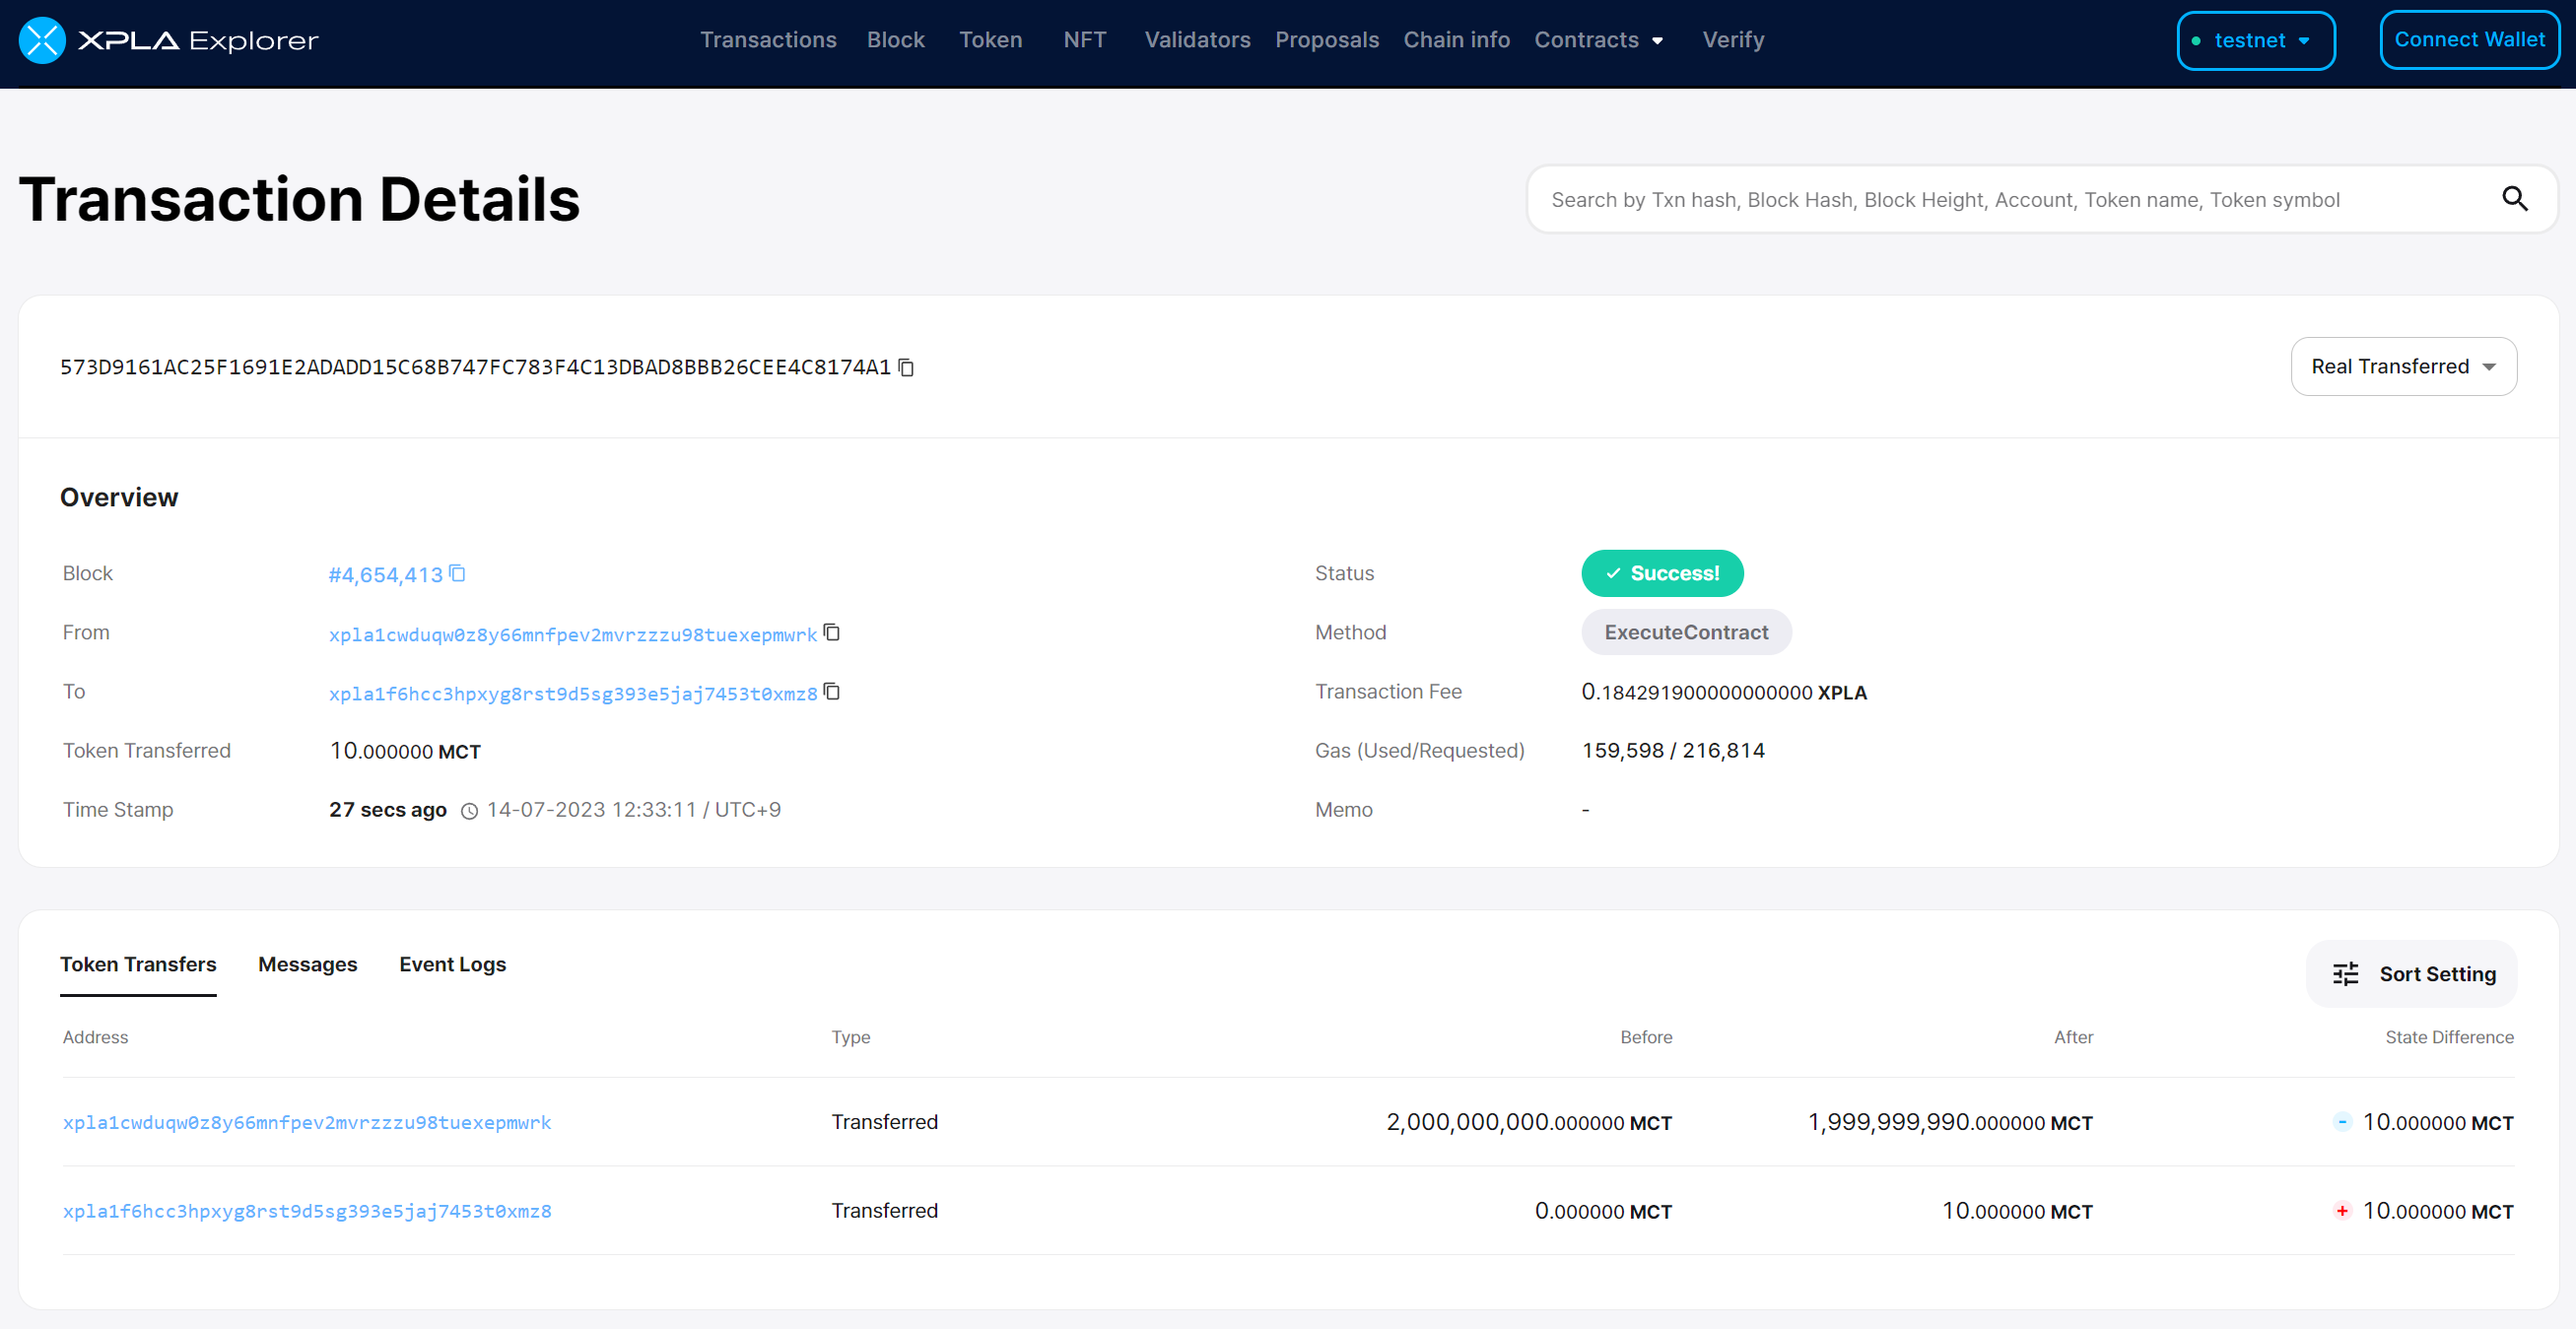
Looking at your wallet again, you'll notice that the previous 2,000,000,000 MCT tokens have decreased by 10. The CW20 transfer has been successfully completed!
We've learned how to issue and transfer CW20 tokens using the Vault app. In the next steps, we'll explore how to directly issue and transfer CW20 tokens using JavaScript code.