Connect React with XPLA Vault Wallet via Wallet Provider
XPLA Wallet Provider is a tool in React that helps you utilize the XPLA Vault wallet. This makes it easier for users to use their Vault wallet within a React web application. Let's dive into using Wallet Provider directly in a React web app.
You can also find information about XPLA Wallet Provider in the XPLA Docs.
In the Edge browser, you cannot connect to the Vault Chrome Extension using Wallet Provider. Instead, you can install the mobile application Vault and establish a connection using the Wallet Connect method.
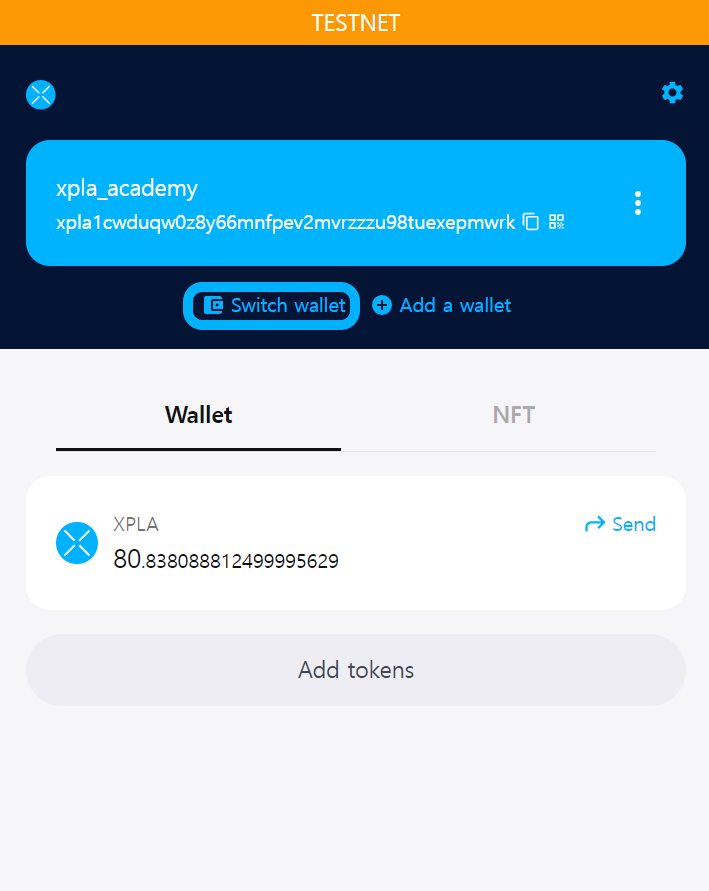
Preview
Below is the code to connect a Vault wallet using Wallet Provider in React. Click the Connect button below and try sending testnet $XPLA.
We were able to receive the user's Vault wallet information through Wallet Provider and complete the process of sending testnet $XPLA. If you've understood the Preview Code, you're ready to move on to the next step.
React Code Along
Let's follow the steps below to understand and work with the Preview Code:
Start by setting up React using CRA.
npx create-react-app xpla-app
cd xpla-app
Install the necessary module for using Wallet Provider. Since Wallet Provider uses a Polyfill, make sure to install
react-scripts@4.0.3as well.npm install react-scripts@4.0.3
npm install @xpla/wallet-provider @xpla/xpla.jsModify the src/index.js file in your React project installed with CRA, as shown in the example.
src/index.jsimport React from "react";
import { createRoot } from "react-dom/client";
import "./index.css";
import {
getChainOptions,
WalletProvider,
} from "@xpla/wallet-provider";
import App from "./App";
const root = createRoot(document.getElementById('root'));
getChainOptions().then((chainOptions) => {
root.render(
<WalletProvider {...chainOptions}>
<App />
</WalletProvider>
);
});Edit the src/App.js file.
src/App.jsimport {
useConnectedWallet,
UserDenied,
useWallet,
WalletStatus,
} from "@xpla/wallet-provider";
import React, { useState, useEffect } from "react";
import { LCDClient, MsgSend } from "@xpla/xpla.js";
export default function App() {
const lcd = new LCDClient({
chainID: 'cube_47-5',
URL: 'https://cube-lcd.xpla.dev'
});
const {
    status,
    network,
    wallets,
    connect,
    disconnect
} = useWallet();

const connectedWallet = useConnectedWallet();
const [amount, setAmount] = useState("");
const [recipient, setRecipient] = useState("");
const [loading, setLoading] = useState(1);
const [txResult, setTxResult] = useState(null);
const [txError, setTxError] = useState(null);
const handleSend = async () => {
try {
const transactionMsg = {
msgs: [
new MsgSend(connectedWallet.walletAddress, recipient, {
axpla: amount
}),
],
};
const tx = await connectedWallet.post(transactionMsg);
if (tx.success) {
setLoading(true);
setTxResult(tx);
}
else setTxError("Please Retry Send!");
} catch (error) {
if (error instanceof UserDenied) {
setTxError("User Denied");
} else {
setTxError("Unknown Error: " + error instanceof Error ? error.message : String(error));
}
}
};
useEffect(() => {
if (txResult && loading !== 0) {
const timer = setTimeout(async () => {
try {
const txInfo = await lcd.tx.txInfo(txResult.result.txhash);
if (txInfo.txhash) setLoading(0);
} catch (err) {
setLoading(loading + 1);
}
}, 1000);
return () => clearTimeout(timer);
}
}, [loading]);
return <div className="example-container">
{status === WalletStatus.WALLET_NOT_CONNECTED ? (
    <>
        <button
            className="button-css width-full"
            type="button"
            onClick={() => connect()}
        >
            Connect Wallet
        </button>
        <p className="warning">If there is no change even after clicking the button, please press the refresh button in the bottom right corner of the screen.</p>
    </>
) : (
<>
<div className="info-container">
<div className="info-title">Connected Address</div>
<div className="info-content">
{wallets.length === 0 ? "Loading..." : wallets[0].xplaAddress}
</div>
</div>
<div className="info-container">
    <label className="info-title" for="recipient">
        Recipient
    </label>
    <input
        className="info-content"
        id="recipient"
        autoComplete="off"
        type="text"
        placeholder="xpla1cwduqw0z8y66mnfpev2mvrzzzu98tuexepmwrk"
        onChange={(e) => setRecipient(e.target.value)}
    />
</div>
<div className="info-container">
    <label className="info-title" for="amount">
        Amount (aXPLA)
    </label>
    <input
        className="info-content"
        autoComplete="off"
        id="Amount"
        placeholder="1"
        onChange={(e) => setAmount(e.target.value)}
    />
</div>
<div className="bottom-button-container">
    <button className="button-css" type="button" onClick={handleSend}>
        Send Tx
    </button>
    <button className="button-css" type="button" onClick={disconnect}>
        Disconnect
    </button>
</div>
{txResult && (
<div style={{ marginTop: 20 }}>
<div className="info-title">Send Transaction Hash</div>
<div className="info-content">
{
loading !== 0 ?
<span>Loading...</span>
:
<a
className="link"
href={"https://explorer.xpla.io/" + network.name + "/tx/" + txResult.result.txhash}
target="_blank"
rel="noreferrer"
>
{txResult.result.txhash}
</a>
}
</div>
</div>
)}
{txError && (
<div style={{ marginTop: 20 }}>
<div className="info-title">Tx Error</div>
<div className="info-content">
<span>
{txError}
</span>
</div>
</div>
)}
</>
)}
</div>
}Make changes to the src/index.css file.
src/index.css.example-container {
box-shadow: 0 4px 6px -1px rgb(0 0 0 / 0.1), 0 2px 4px -2px rgb(0 0 0 / 0.1);
border-radius: 4px;
padding: 24px 32px 24px 32px;
margin-bottom: 32px;
}
.width-full {
width: 100%;
}
.button-css {
background-color: #00B1FF;
color: white;
font-weight: 600;
padding: 8px 16px 8px 16px;
font-size: 16px;
border: 0px;
border-radius: 8px;
}
.button-css:hover {
cursor: pointer;
opacity: 0.9;
}
.info-container {
margin-bottom: 32px;
}
.info-title {
display: block;
color: #16161A;
font-size: 16px;
font-weight: 600;
margin-bottom: 8px;
}
.info-content {
box-shadow: 0 1px 3px 0 rgb(0 0 0 / 0.1), 0 1px 2px -1px rgb(0 0 0 / 0.1);
border-radius: 4px;
width: calc(100% - 24px);
padding: 8px 12px 8px 12px;
font-size: 14px;
}
.bottom-button-container {
display: flex;
align-items: center;
justify-content: space-between;
}
.link {
color: #00B1FF;
word-break: break-all;
}
.link:hover {
color: #00B1FF;
}
.warning {
color: #FF335F;
}Run React locally.
npm start
After this, you can access the Vault wallet connection like in the preview by visiting localhost:3000 in your browser. Try sending testnet $XPLA directly.
App.js Code Analysis
Let's analyze the code in the App.js file, which directly uses the Wallet Provider.
Line 16~24
We've used the useWallet and useConnectedWallet functions from the @xpla/wallet-provider module. The status variable indicates whether the user is connected to the Vault Chrome Extension. If the user's wallet is not connected, the connectedWallet variable holds an undefined value.
const {
status,
network,
wallets,
connect,
disconnect
} = useWallet();
const connectedWallet = useConnectedWallet();
Line 72~83
When the user hasn't connected their Vault wallet yet (status === WalletStatus.WALLET_NOT_CONNECTED), we display the Connect Wallet button. Clicking this button triggers the connect function. This function, an embedded feature of the @xpla/wallet-provider module, opens a modal window to connect to the Vault.
{status === WalletStatus.WALLET_NOT_CONNECTED ? (
<>
<button
className="button-css width-full"
type="button"
onClick={() => connect()}
>
Connect Wallet
</button>
<p className="warning">If there is no change even after clicking the button, please press the refresh button in the bottom right corner of the screen.</p>
</>
) : (
When the user connects their wallet, the address information they're using in the Vault is stored in the connectedWallet variable. Users can switch wallet addresses using the Switch wallet button in the Vault.

Line 91~123
In the example React interface, we take Recipient and Amount as input values. Clicking the Send Tx button triggers the handleSend function.
<div className="info-container">
<label className="info-title" for="recipient">
Recipient
</label>
<input
className="info-content"
id="recipient"
autoComplete="off"
type="text"
placeholder="xpla1cwduqw0z8y66mnfpev2mvrzzzu98tuexepmwrk"
onChange={(e) => setRecipient(e.target.value)}
/>
</div>
<div className="info-container">
<label className="info-title" for="amount">
Amount (aXPLA)
</label>
<input
className="info-content"
autoComplete="off"
id="Amount"
placeholder="1"
onChange={(e) => setAmount(e.target.value)}
/>
</div>
<div className="bottom-button-container">
<button className="button-css" type="button" onClick={handleSend}>
Send Tx
</button>
<button className="button-css" type="button" onClick={disconnect}>
Disconnect
</button>
</div>
Line 33~55
The handleSend function sends testnet $XPLA from the user's connected wallet to the recipient's wallet, based on the amount (aXPLA) entered. It creates a transaction message at line 35 and broadcasts the transaction to the blockchain network at line 42.
const handleSend = async () => {
    try {
        const transactionMsg = {
            msgs: [
                new MsgSend(connectedWallet.walletAddress, recipient, {
                    axpla: amount
                }),
            ],
        };
        const tx = await connectedWallet.post(transactionMsg);
        if (tx.success) {
            setLoading(true);
            setTxResult(tx);
        }
        else setTxError("Please Retry Send!");
    } catch (error) {
        if (error instanceof UserDenied) {
            setTxError("User Denied");
        } else {
            setTxError("Unknown Error: " + error instanceof Error ? error.message : String(error));
        }
    }
};
Line 57~69
In the XPLA blockchain, blocks are generated about every 6 seconds. So, after propagating a transaction, it takes a bit of time for it to be recorded in the blockchain. To confirm whether the transaction is successfully recorded, the example uses the LCDClient to check if there's a transaction corresponding to the hash value.
If the transaction is successfully propagated in the handleSend function, the loading variable in React State changes to true (line 44). Since the loading variable is included in the dependency array of useEffect, the callback function of useEffect is executed. The callback function sends queries to the LCDClient every second using the setTimeout function until the transaction data is received.
useEffect(() => {
    if (txResult && loading !== 0) {
        const timer = setTimeout(async () => {
            try {
                const txInfo = await lcd.tx.txInfo(txResult.result.txhash);
                if (txInfo.txhash) setLoading(0);
            } catch (err) {
                setLoading(loading + 1);
            }
        }, 1000);
        return () => clearTimeout(timer);
    }
}, [loading]);
The method of retrieving transaction data using LCDClient is an application of what you learned in the previous step.
Line 124~143
Once the transaction data is received and the loading variable becomes 0, the React interface displays the transaction hash value to the user. Clicking the hash value links to the XPLA Explorer.
{txResult && (
    <div style={{ marginTop: 20 }}>
        <div className="info-title">Send Transaction Hash</div>
        <div className="info-content">
            {
                loading !== 0 ?
                    <span>Loading...</span>
                    :
                    <a
                        className="link"
                        href={"https://explorer.xpla.io/" + network.name + "/tx/" + txResult.result.txhash}
                        target="_blank"
                        rel="noreferrer"
                    >
                        {txResult.result.txhash}
                    </a>
            }
        </div>
    </div>
)}
So far, we've explored using the @xpla/wallet-provider module in React. We've connected the user's Vault wallet information to React and successfully sent testnet $XPLA. Customize the example code to suit your game and make it easy for users to interact with the blockchain.